
Intro
![]()
The MMDVM software is a fabulous development realised by Jonathan G4KLX allowing to built a multimode digital hamradio repeater. Indeed, it can manage the three digtal modes DSTAR,DMR and C4FM.

MMDVM is composed of two physical parts.
- The part to decoding/encoding digital modes : MMDVM. This software is installed on an Arduino Due
- The network interfacing part, that connects to the reflectors, Talk Group Brandmeister or YSF Reflector : MMDVM Host, which is maily installed on the nano computer Raspberry Pi.
![[en:]Synoptic MMDVM[fr:]Synoptique MMDVM](https://www.f5uii.net/wp-content/uploads/2016/08/Synoptique-MMDVM.gif)
Synoptic of Digital Repeater using MultiMode Digital Voice Modem (MMDVM)
The tutorial is to read through several pages. For easy navigation, use the summary and the proposed navigation section at the bottom of each page.
Installation of the Arduino board
You buy your Arduino Due board, and the first thing to do is install the Arduino IDE editing software. Download the installation file (86Mo for the 1.6.0 version of the IDE) on page https://www.arduino.cc/en/Main/Software
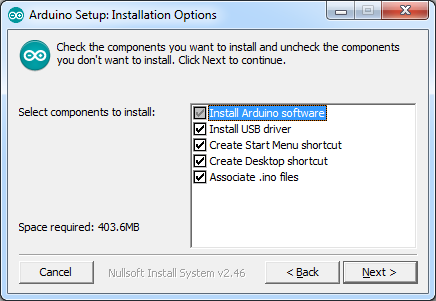
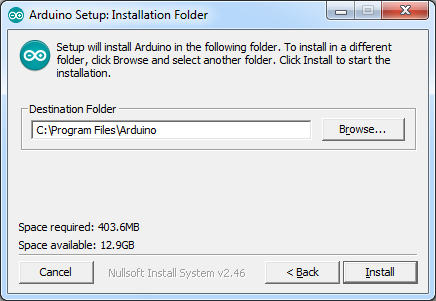
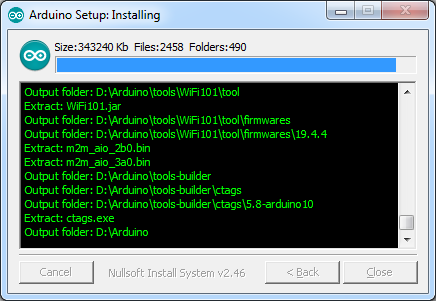
Install the software. All the checkbox are checked especially Install USB Driver.

Several USB driver installation safety questions are asked. Of course, we answer Install.
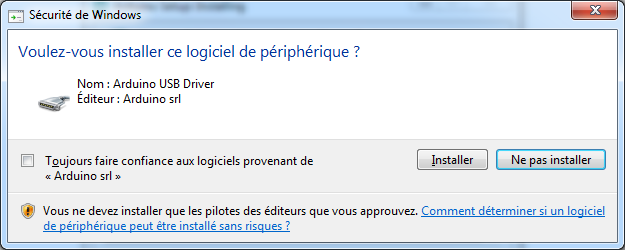

The message Completed is displayed, the installation is finieshed, Click Close.
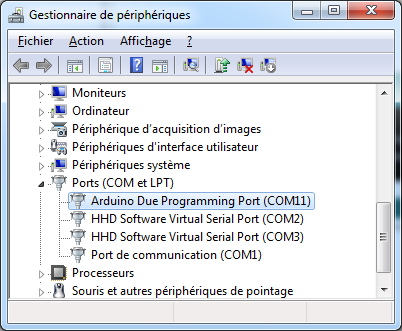
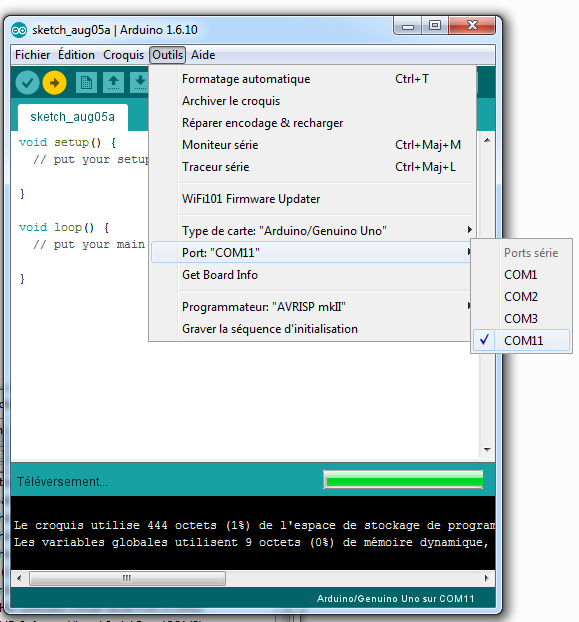
Connect the Arduino Due card on the programming of USB (external power connector side), the Device Manager of Windows adds a serial COM ports. In my case, a COM11 Port (Port Programming Arduino Die).


From your Star menu, you launch the software Arduino.


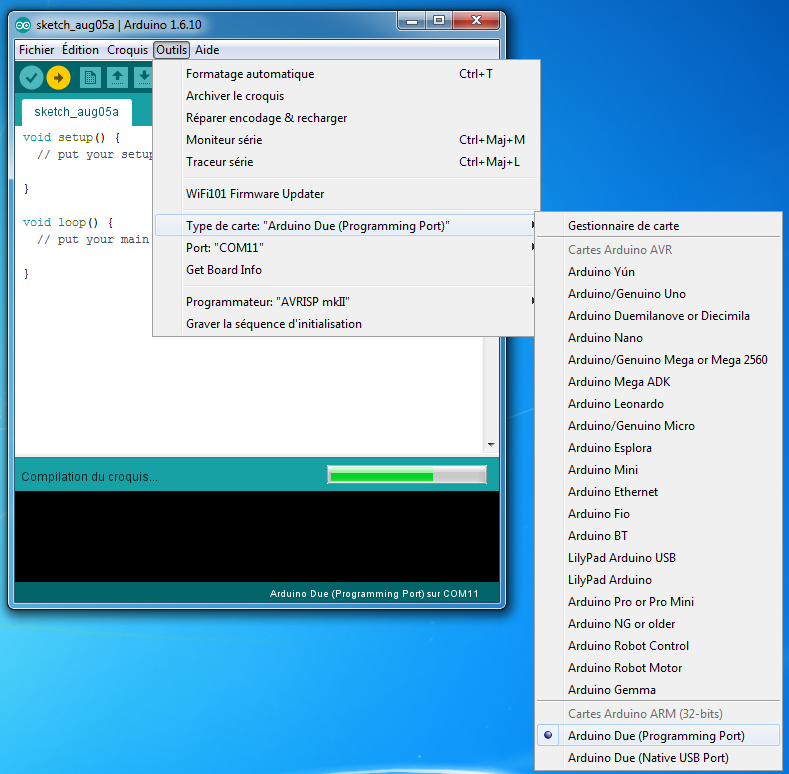
Choose the serial port corresponding a the Arduino link (here COM11) in the menu Tools / Ports.

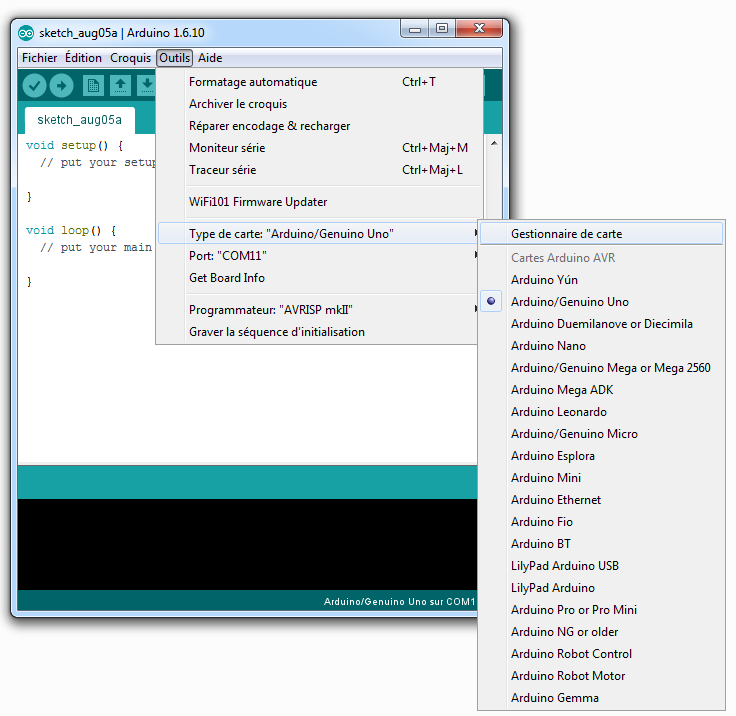
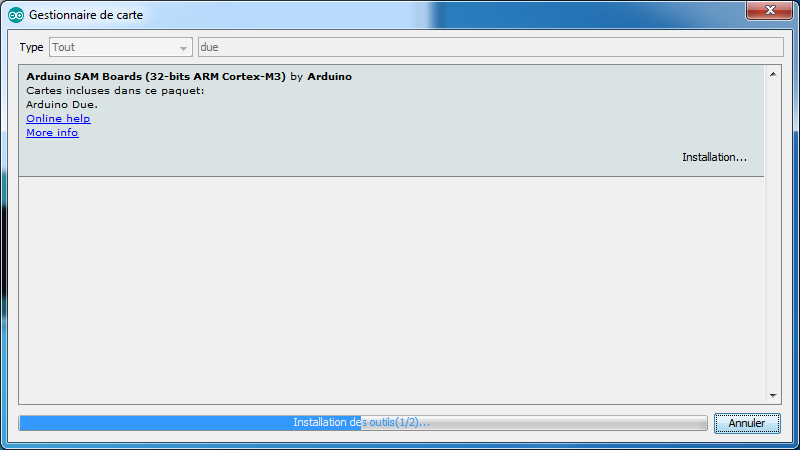
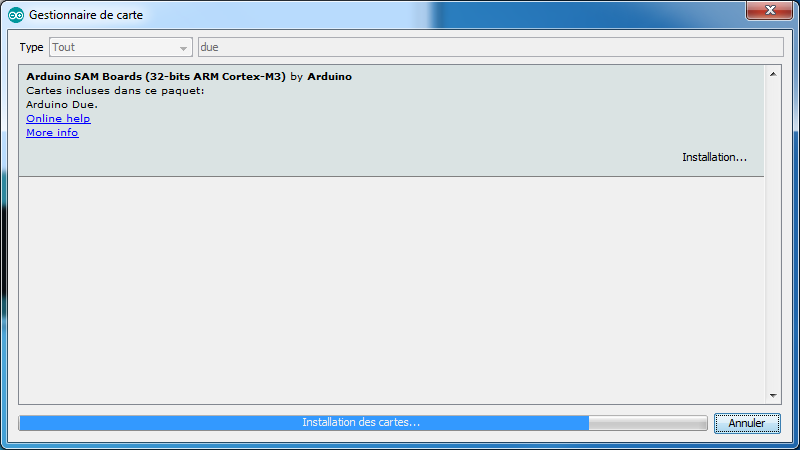
Then choose Tools / Boards Manager. The manager downloads the definitions of Arduino cards over internet.

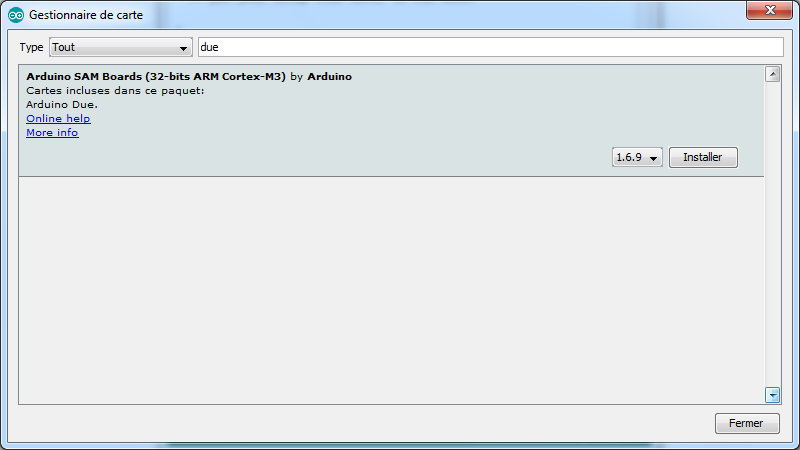
Dans le champs Filter your search, type due. Select the line Arduino SAM Boards (32-bits ARM Cortex-M3), et click Install.

Select now at the bottom of menu Tools / Boards : “Arduino Due (Programming Port)”

Before programming the Arduino with MMDVM software, we will inject a small test program to check that everything is correctly set.
This test program This test program is just going to blink the LED L existing on the Arduino Due board.
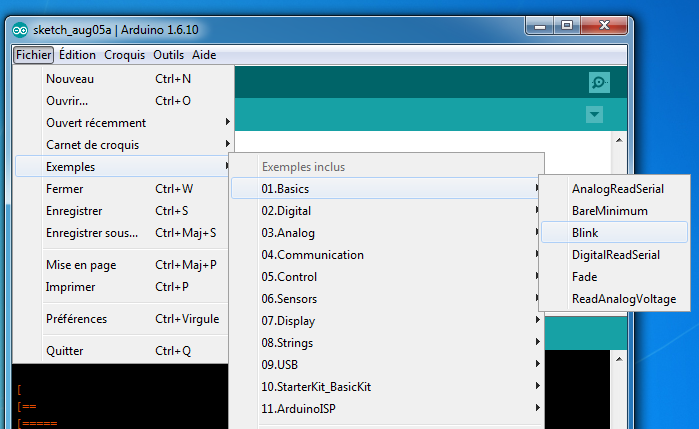
Open then existing program in the menu File / Examples / 01.Basics / Blink

/*
  Blink
  Turns on an LED on for one second, then off for one second, repeatedly.

  Most Arduinos have an on-board LED you can control. On the Uno and
  Leonardo, it is attached to digital pin 13. If you're unsure what
  pin the on-board LED is connected to on your Arduino model, check
  the documentation at http://www.arduino.cc

  This example code is in the public domain.

  modified 8 May 2014
  by Scott Fitzgerald
 */


// the setup function runs once when you press reset or power the board
void setup() {
  // initialize digital pin 13 as an output.
  pinMode(13, OUTPUT);
}

// the loop function runs over and over again forever
void loop() {
  digitalWrite(13, HIGH);   // turn the LED on (HIGH is the voltage level)
  delay(1000);              // wait for a second
  digitalWrite(13, LOW);    // turn the LED off by making the voltage LOW
  delay(1000);              // wait for a second
}
Therefore, this program will simply change the output state of Pin 13 on which is connected L lamp of the board.
To inject the program in the Arduino Due, click on the arrow.
![]()

The program is then compiled by the software, then loaded into the Arduino. From there, the program flashes the LED, is working independently on the Arduino board and of course does not need anymore the Arduino PC software, which has just been used for compilation and loading.
The lower window software shows the progress of the compilation, loading and initialization of the Arduino program. The message ‘Verify successful‘ indicates the successful completion of the compilation.
Le croquis utilise 22 124 octets (4%) de l'espace de stockage de programmes. Le maximum est de 524 288 octets.
Atmel SMART device 0x285e0a60 found
Erase flash
done in 0.035 seconds

Write 24392 bytes to flash (96 pages)

[                              ] 0% (0/96 pages)
[==                            ] 9% (9/96 pages)
[=====                         ] 18% (18/96 pages)
[========                      ] 28% (27/96 pages)
[===========                   ] 37% (36/96 pages)
[==============                ] 46% (45/96 pages)
[================              ] 56% (54/96 pages)
[===================           ] 65% (63/96 pages)
[======================        ] 75% (72/96 pages)
[=========================     ] 84% (81/96 pages)
[============================  ] 93% (90/96 pages)
[==============================] 100% (96/96 pages)
done in 5.126 seconds

Verify 24392 bytes of flash

[                              ] 0% (0/96 pages)
[==                            ] 9% (9/96 pages)
[=====                         ] 18% (18/96 pages)
[========                      ] 28% (27/96 pages)
[===========                   ] 37% (36/96 pages)
[==============                ] 46% (45/96 pages)
[================              ] 56% (54/96 pages)
[===================           ] 65% (63/96 pages)
[======================        ] 75% (72/96 pages)
[=========================     ] 84% (81/96 pages)
[============================  ] 93% (90/96 pages)
[==============================] 100% (96/96 pages)
Verify successful
done in 5.175 seconds
Set boot flash true
CPU reset.
Here the flashing LED …

We go now to install the software on MMDVM Arduino Due.
![]()
In fact, before installing the software MMDVM, we have yet to achieve a small change in the configuration of the Arduino editor.
Amendement of IDE configuration
A specified in the file Built.txt, changes are needed on the definition of an Arduino software configuration file.
Open the directory C:\Users\User\AppData\Local\Arduino15\packages\arduino\hardware\sam\1.6.9
For other platforms, reported directly to the instruction file Built.txt.
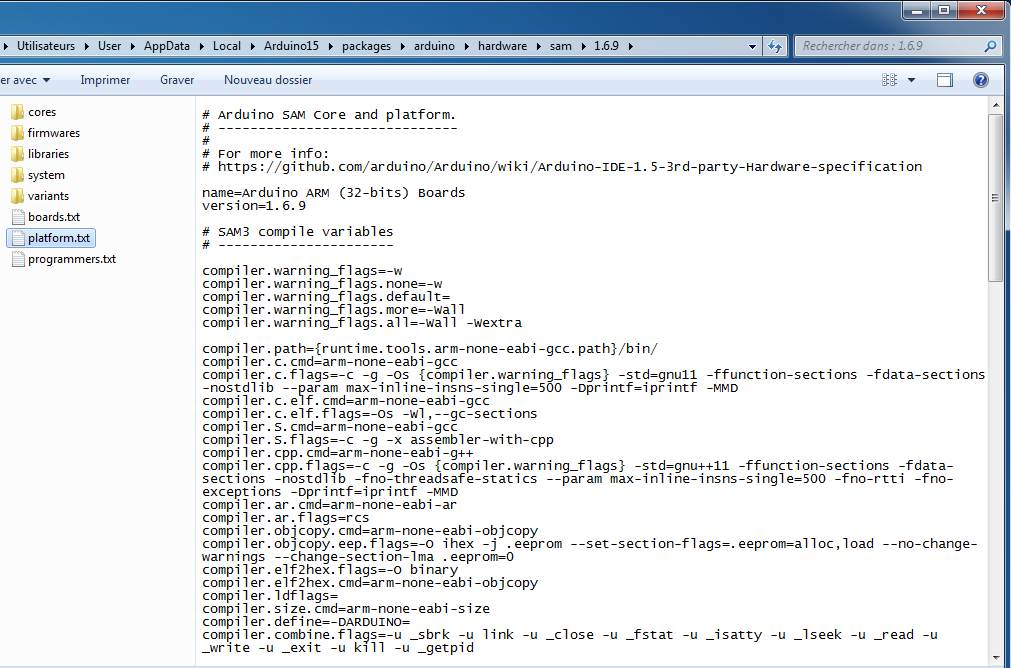

Make a backup copy of the file platform.txt
Edit the file with a platform.txt programming editor (for example Notepad + ou SublimeText)
The following line must be changed (in my case, line is 80th)
## Combine gc-sections, archives, and objects
recipe.c.combine.pattern="{compiler.path}{compiler.c.elf.cmd}" -mcpu={build.mcu} -mthumb {compiler.c.elf.flags} "-T{build.variant.path}/{build.ldscript}" "-Wl,-Map,{build.path}/{build.project_name}.map" {compiler.c.elf.extra_flags} -o "{build.path}/{build.project_name}.elf" "-L{build.path}" -Wl,--cref -Wl,--check-sections -Wl,--gc-sections -Wl,--entry=Reset_Handler -Wl,--unresolved-symbols=report-all -Wl,--warn-common -Wl,--warn-section-align -Wl,--start-group {compiler.combine.flags} {object_files} "{build.variant.path}/{build.variant_system_lib}" "{build.path}/{archive_file}" -Wl,--end-group -lm -gcc
## Combine gc-sections, archives, and objects
recipe.c.combine.pattern="{compiler.path}{compiler.c.elf.cmd}" -mcpu={build.mcu} -mthumb {compiler.c.elf.flags} "-T{build.variant.path}/{build.ldscript}" "-Wl,-Map,{build.path}/{build.project_name}.map" {compiler.c.elf.extra_flags} -o "{build.path}/{build.project_name}.elf" "-L{build.path}" -Wl,--cref -Wl,--check-sections -Wl,--gc-sections -Wl,--entry=Reset_Handler -Wl,--unresolved-symbols=report-all -Wl,--warn-common -Wl,--warn-section-align -Wl,--start-group {compiler.combine.flags} {object_files} "{build.variant.path}/{build.variant_system_lib}" "{build.system.path}/CMSIS/CMSIS/Lib/ARM/arm_cortexM3l_math.lib" "{build.path}/{archive_file}" -Wl,--end-group -lm -gcc
This is equivalent to practically added at the end of the line the following part
"{build.system.path}/CMSIS/CMSIS/Lib/ARM/arm_cortexM3l_math.lib"
Indeed, if one does not realize the change described in Built.txt, a following compile error may appear: :
sketch\DMRTX.cpp.o: In function `CDMRTX::writeByte(unsigned char, unsigned char)':

sketch/DMRTX.cpp:299: undefined reference to `arm_fir_fast_q15'

sketch\DStarTX.cpp.o: In function `CDStarTX::writeByte(unsigned char)':

sketch/DStarTX.cpp:453: undefined reference to `arm_fir_fast_q15'

sketch\IO.cpp.o: In function `CIO::process()':

sketch/IO.cpp:344: undefined reference to `arm_fir_fast_q15'

sketch/IO.cpp:351: undefined reference to `arm_fir_fast_q15'

sketch/IO.cpp:362: undefined reference to `arm_fir_fast_q15'

sketch\IO.cpp.o:sketch/IO.cpp:369: more undefined references to `arm_fir_fast_q15' follow

collect2.exe: error: ld returned 1 exit status

exit status 1
Erreur de compilation pour la carte Arduino Due (Programming Port)
After installing the software for charging via USB Arduino Due and making this modification platform.txt file, we can now take care of the load Jonathan G4KLX software on the Arduino Due. This is done in three stages.
Downloading MMDVM software
- The firmware (software) Arduino MMDVM be downloaded on the platform github
https://github.com/g4klx/MMDVM - Download the ZIP from the button located at the top right.
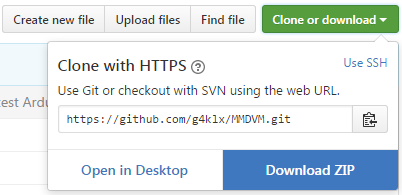
- Unzip the file MMDVM-master.zip in a directory.
- Rename directory in MMDVM

Configure the MMDVM software
Open then file MMDVM/MMDVM.ino (by double click on the file from a windows explorer, the Arduino Editor will directly start)
Click on “Config.h” tab.
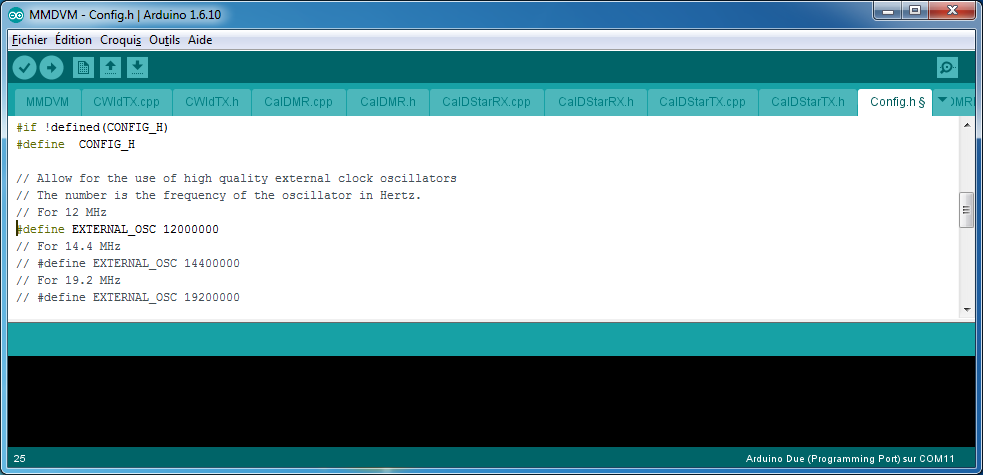

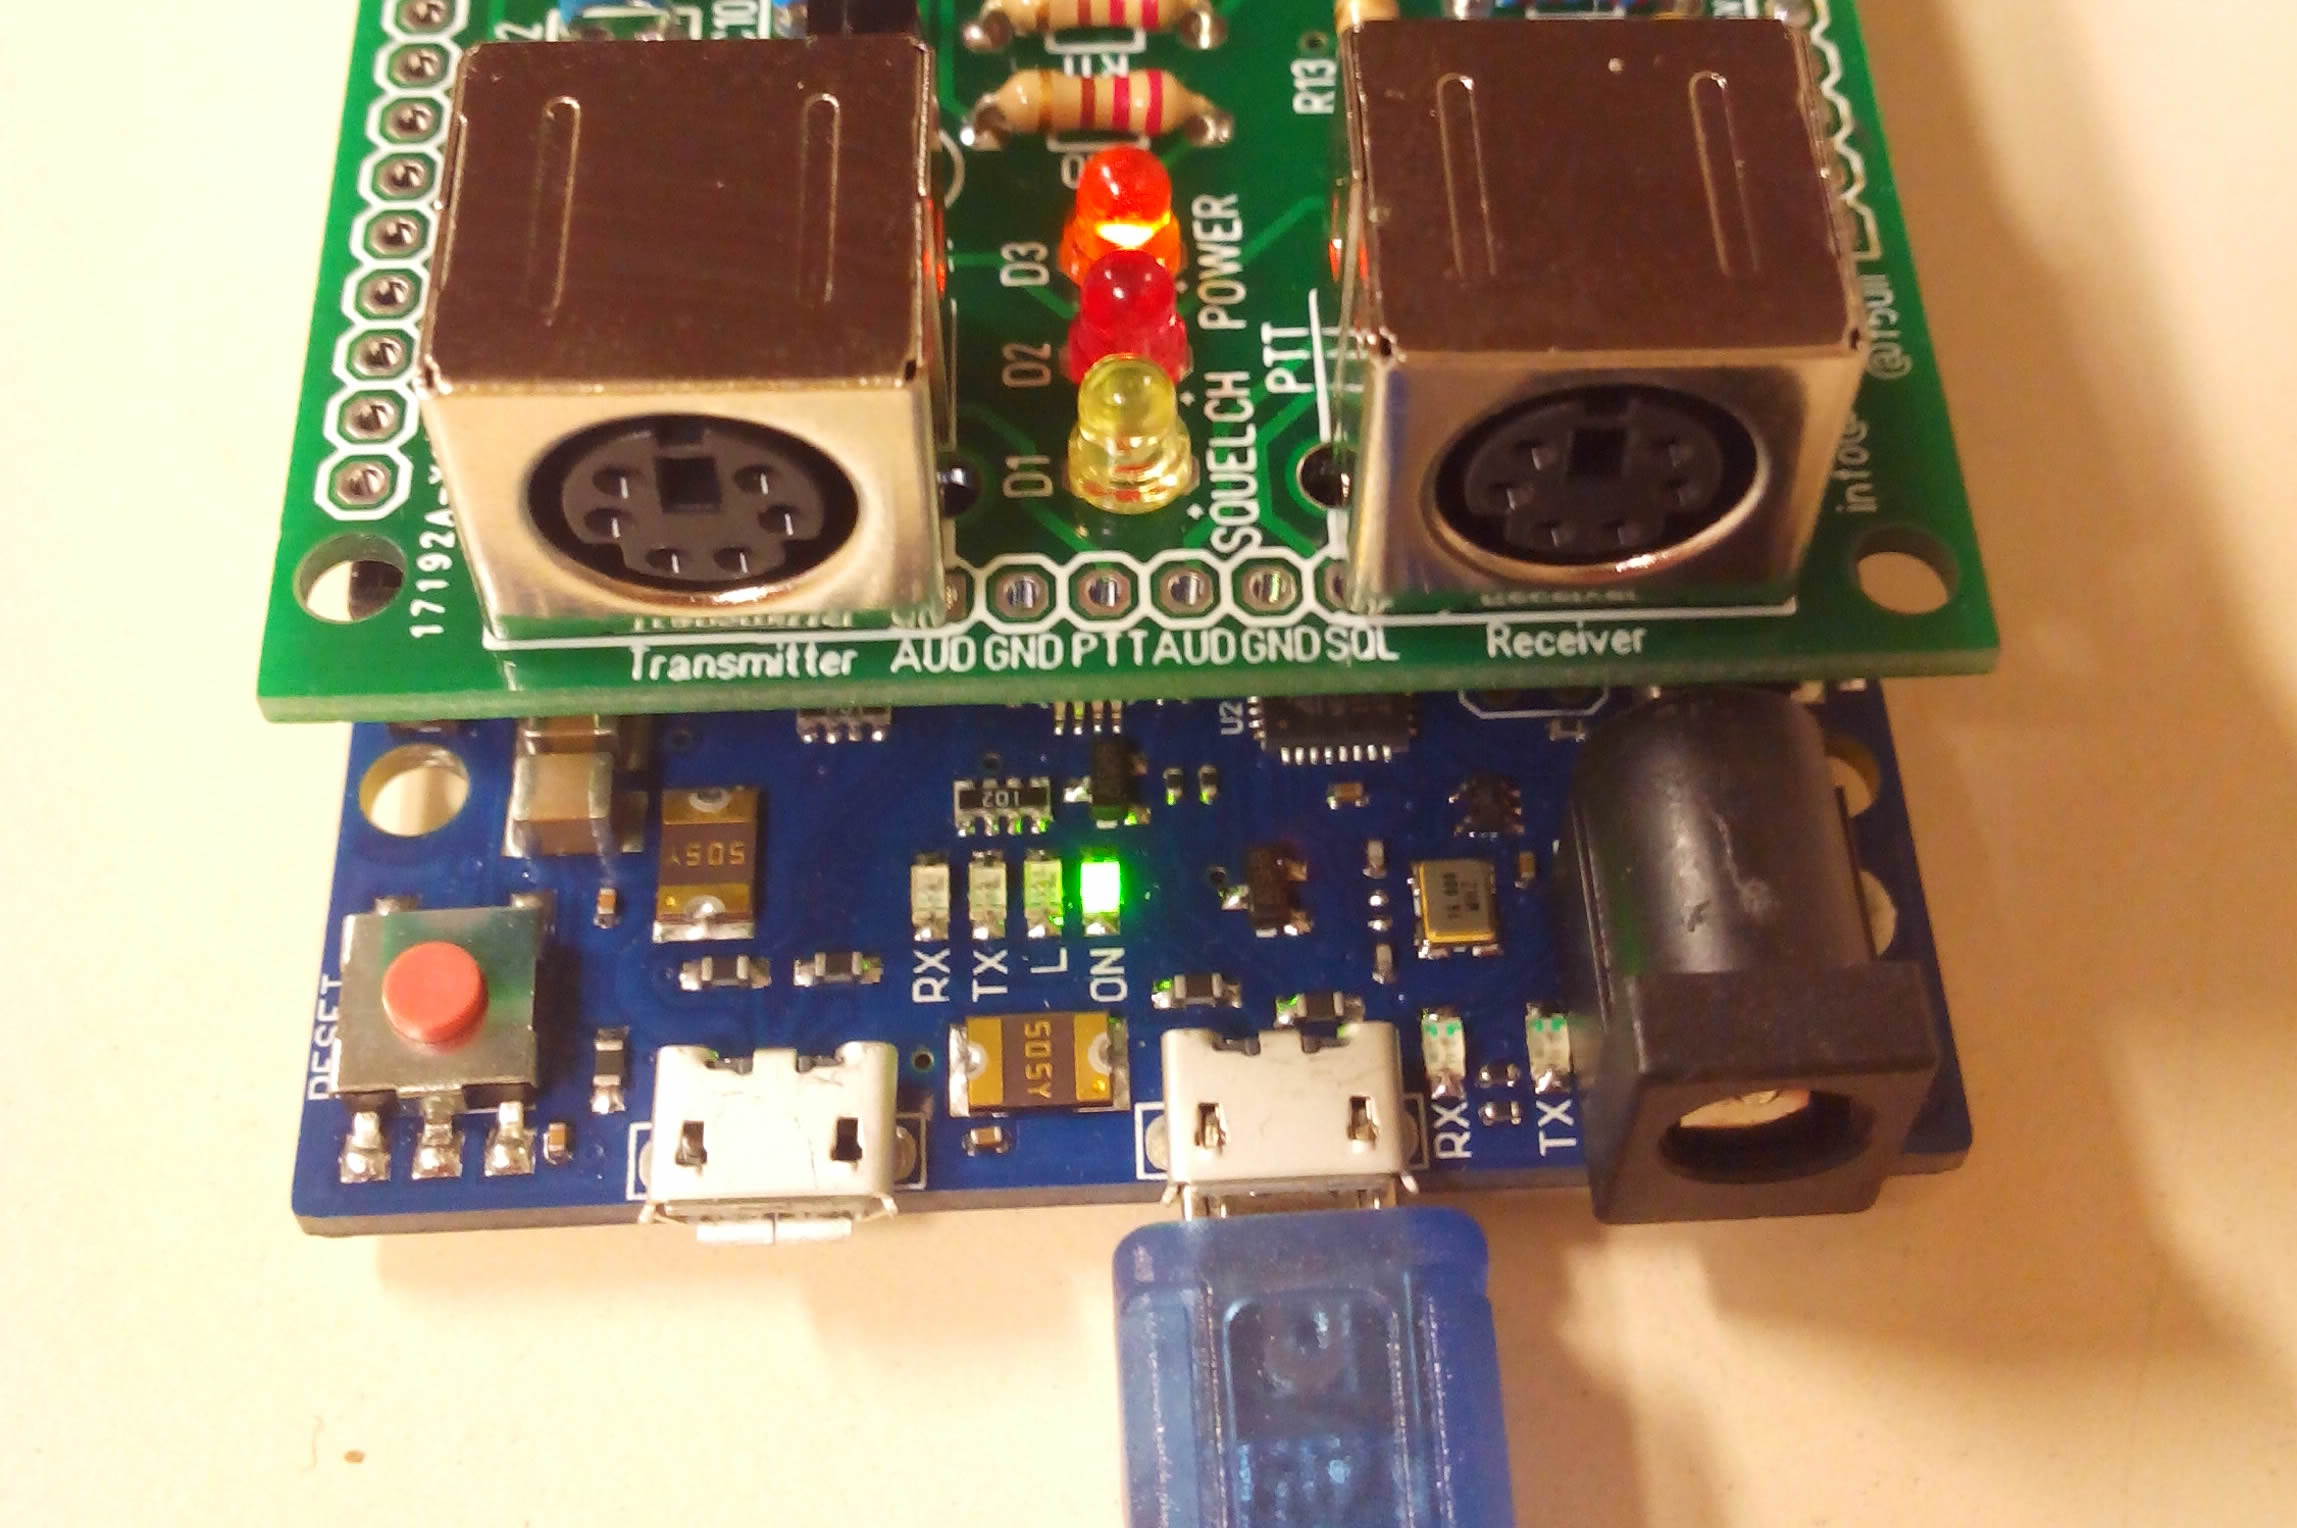
Edit the following for the operation matches the platinum MMDVM I realized (PCB printed “PCB designed by F5UII 07.2016”) . Save the file Config.h (Ctrl-S or File/Save)
- TCXO oscillator is a 12 Mhz
- The board is inspired by SP8NTH (the line #define ARDUINO_DUE_ZUM_V10 is commented with // signs at the beginning of the line). We delete // in front of #define ARDUINO_DUE_NTH
/*
 *   Copyright (C) 2015,2016 by Jonathan Naylor G4KLX
 *
 *   This program is free software; you can redistribute it and/or modify
 *   it under the terms of the GNU General Public License as published by
 *   the Free Software Foundation; either version 2 of the License, or
 *   (at your option) any later version.
 *
 *   This program is distributed in the hope that it will be useful,
 *   but WITHOUT ANY WARRANTY; without even the implied warranty of
 *   MERCHANTABILITY or FITNESS FOR A PARTICULAR PURPOSE.  See the
 *   GNU General Public License for more details.
 *
 *   You should have received a copy of the GNU General Public License
 *   along with this program; if not, write to the Free Software
 *   Foundation, Inc., 675 Mass Ave, Cambridge, MA 02139, USA.
 */

#if !defined(CONFIG_H)
#define  CONFIG_H

// Allow for the use of high quality external clock oscillators
// The number is the frequency of the oscillator in Hertz.
// For 12 MHz
#define EXTERNAL_OSC 12000000
// For 14.4 MHz
// #define EXTERNAL_OSC 14400000
// For 19.2 MHz
// #define EXTERNAL_OSC 19200000

// Allow the use of the COS line to lockout the modem
// #define USE_COS_AS_LOCKOUT

// Use pins to output the current mode
// #define ARDUINO_MODE_PINS

// For the original Arduino Due pin layout
// #define  ARDUINO_DUE_PAPA

// For the ZUM Board V1.0 pin layout
// #define  ARDUINO_DUE_ZUM_V10

// For the SP8NTH board
#define  ARDUINO_DUE_NTH

// To use wider C4FSK filters for DMR and System Fusion on transmit
// #define WIDE_C4FSK_FILTERS_TX
// To use wider C4FSK filters for DMR and System Fusion on receive
// #define WIDE_C4FSK_FILTERS_RX

#endif
Compile and load MMDVM on the Arduino Due
- Select the first tab ‘MMDVM’ by a click
- Click on the icon V for Check. The compiling of the MMDVM software starts . Downwards window indicates progress.
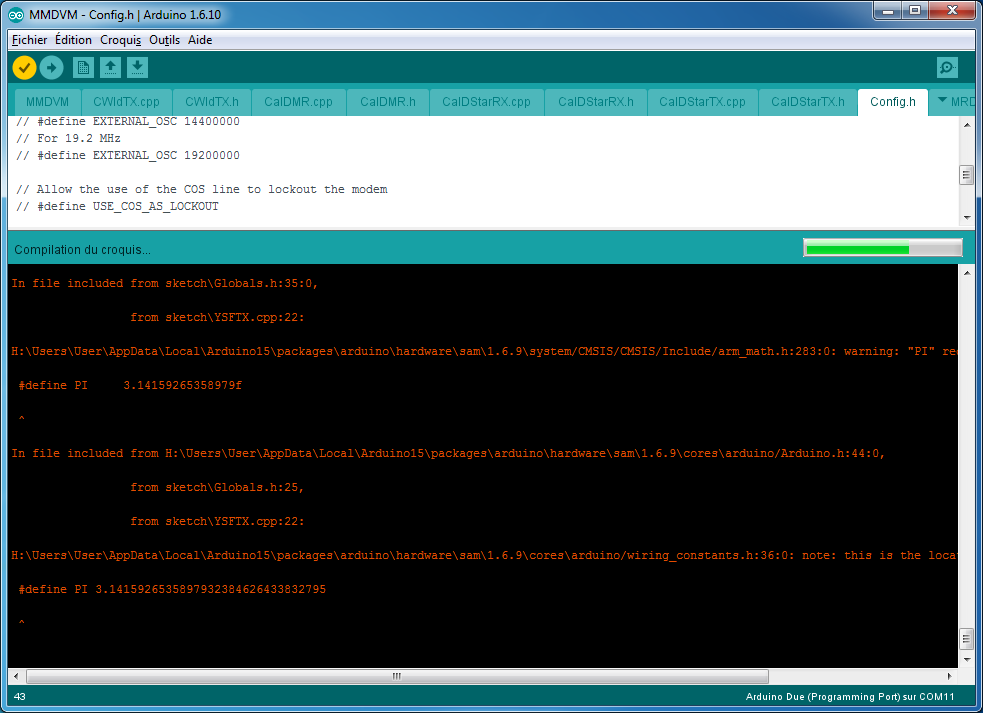
- If the compilation is completed without error, you can load the software into the Arduino Due, by clicking the arrow

Le croquis utilise 53 304 octets (10%) de l'espace de stockage de programmes. Le maximum est de 524 288 octets.
Atmel SMART device 0x285e0a60 found
Erase flash
done in 0.036 seconds

Write 55924 bytes to flash (219 pages)

[                              ] 0% (0/219 pages)
[==                            ] 9% (21/219 pages)
[=====                         ] 19% (42/219 pages)
[========                      ] 28% (63/219 pages)
[===========                   ] 38% (84/219 pages)
[==============                ] 47% (105/219 pages)
[=================             ] 57% (126/219 pages)
[====================          ] 67% (147/219 pages)
[=======================       ] 76% (168/219 pages)
[=========================     ] 86% (189/219 pages)
[============================  ] 95% (210/219 pages)
[==============================] 100% (219/219 pages)
done in 11.677 seconds

Verify 55924 bytes of flash

[                              ] 0% (0/219 pages)
[==                            ] 9% (21/219 pages)
[=====                         ] 19% (42/219 pages)
[========                      ] 28% (63/219 pages)
[===========                   ] 38% (84/219 pages)
[==============                ] 47% (105/219 pages)
[=================             ] 57% (126/219 pages)
[====================          ] 67% (147/219 pages)
[=======================       ] 76% (168/219 pages)
[=========================     ] 86% (189/219 pages)
[============================  ] 95% (210/219 pages)
[==============================] 100% (219/219 pages)
Verify successful
done in 11.246 seconds
Set boot flash true
CPU reset.
After that
Pressing the reset button, the L LED of the Arduino start blinking. The MMDVM firmware is now ready .
The following consists of installing on a second MMDVMHost software on a Raspberry Pi. This will be detailed by a second article, which will also present the adjustments to do on the MMDVM shield low-frequency filters installed on the Arduino.
Feel free to post your questions or comments by intermediaries comment field at the bottom of article.
