Next to my previous article devoted to programming MMDVM firmware on an Arduino Due board, here is the step-by-step presentation of programming MMDVM on a STM32F4xx board.
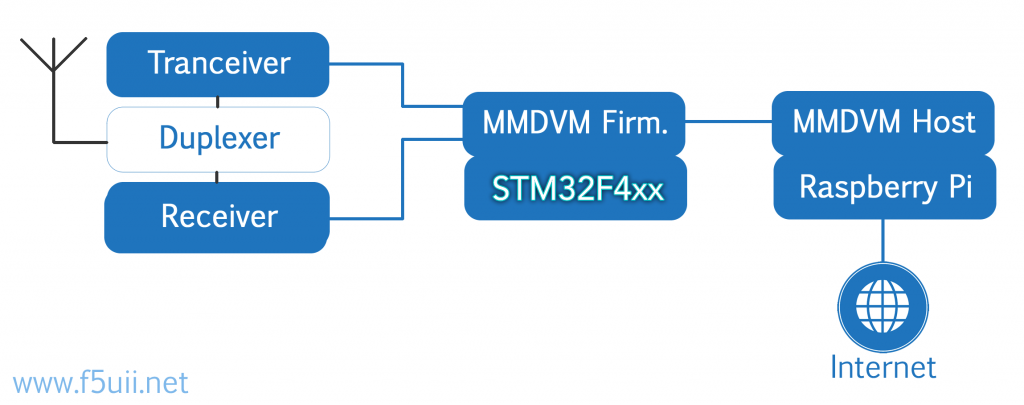
Synoptic of a repeater using the “MultiMode Digital Voice Modem” (MMDVM) installed on an STM32 board
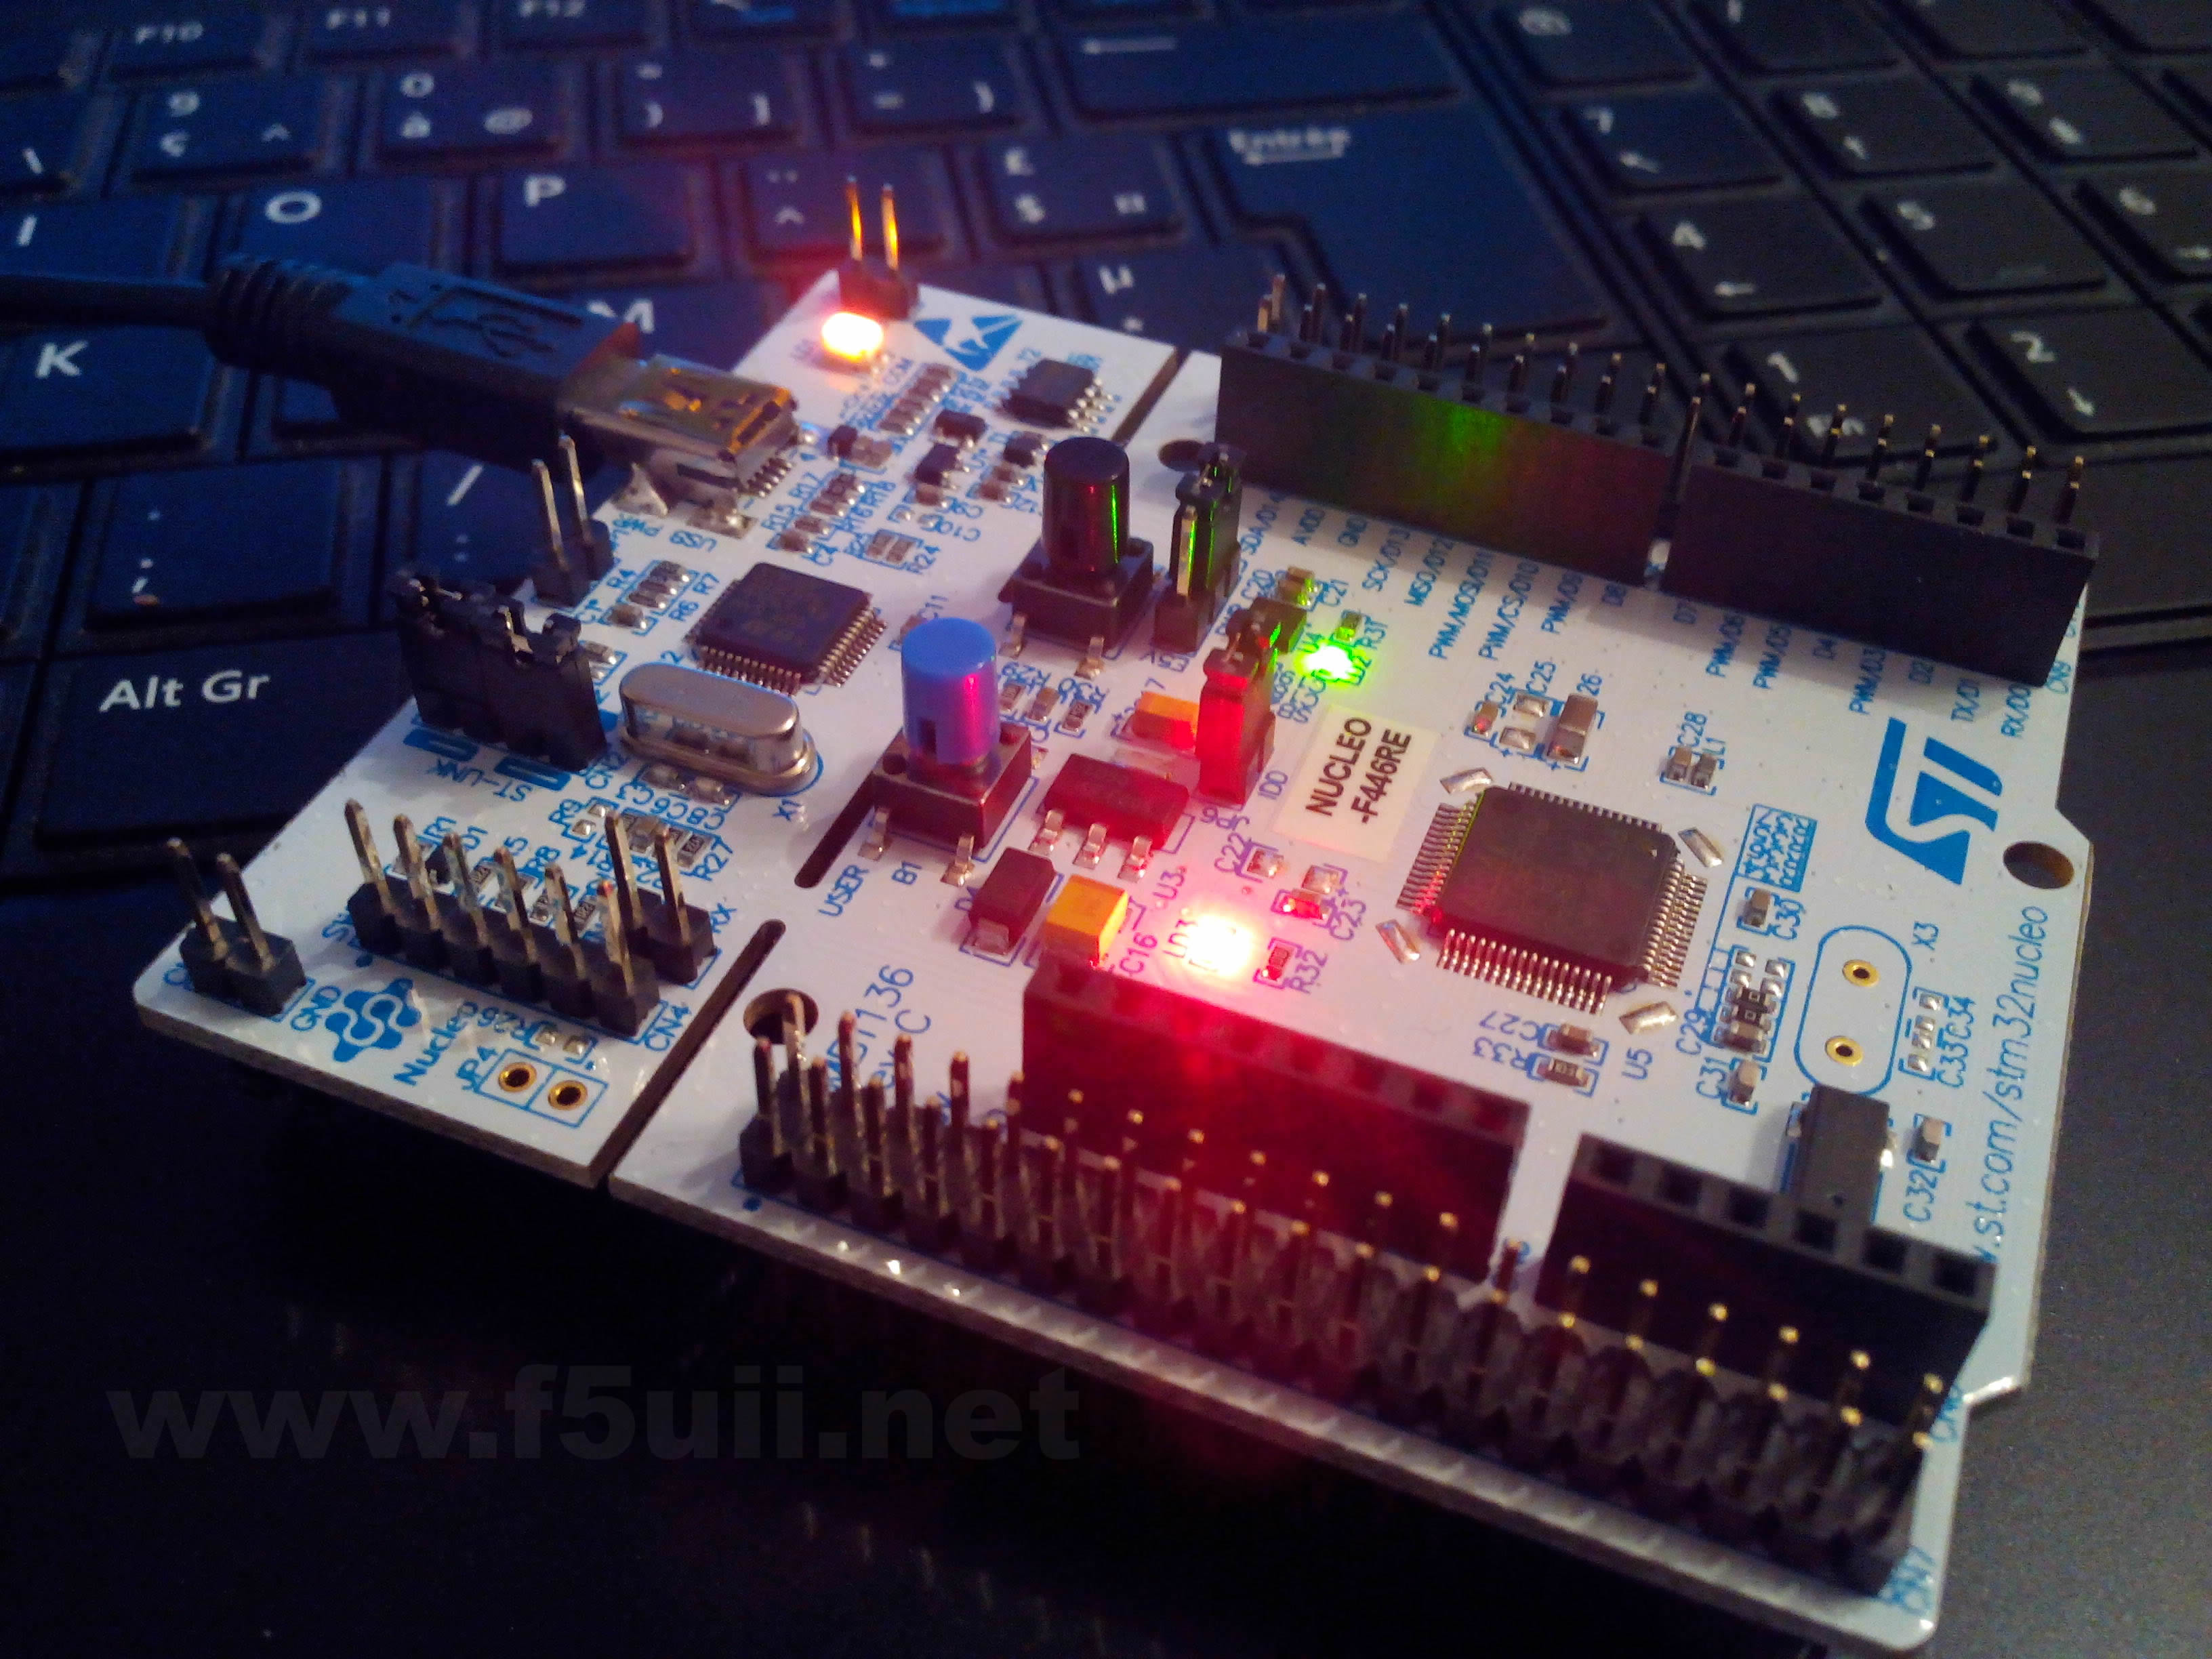
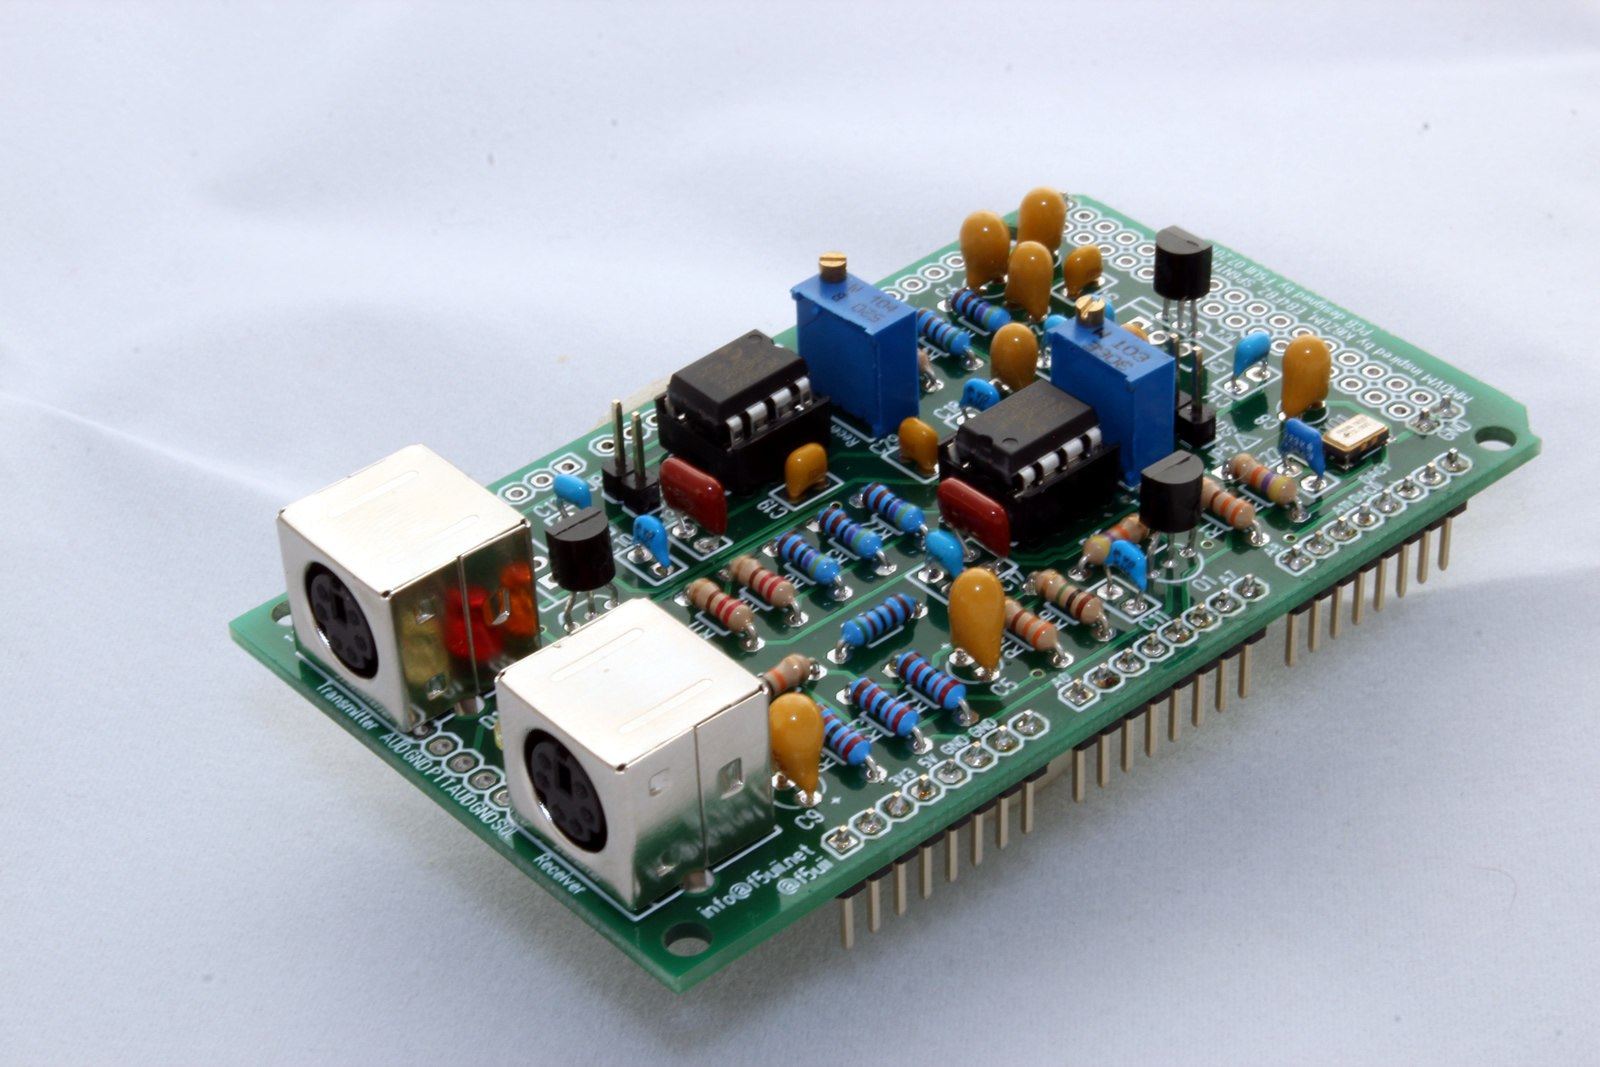
La platine STM32F4xx du constructeur ST Micro electronic permet avantageusement de remplacer l’Arduino Due dans son application de relais numérique multimode MMDVM. De plus la platine STM32F446RE Nucleo par exemple est accessible à un prix plutôt bas (environ 15€)
The STM32F4xx board of the manufacturer ST Micro electronic advantageously allows to replace the Arduino Due in its application of multimode digital MMDVM repeater . Moreover the STM32F446RE Nucleo for example is accessible at a rather low price (about 15 €)
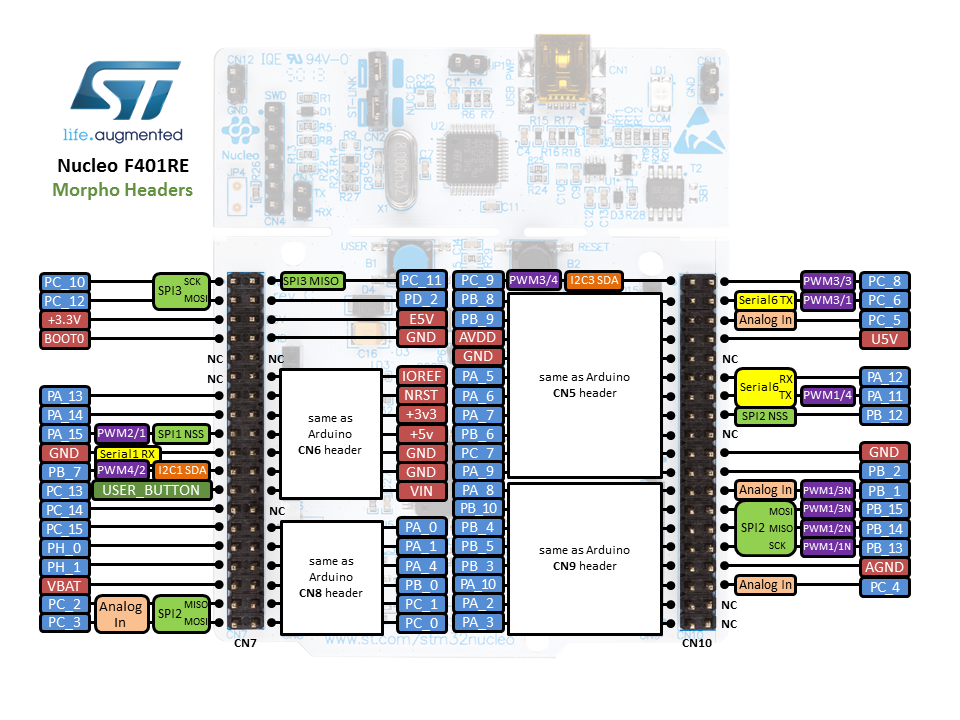
Pinout of the Nucleo STM32F4 Board
Download MMDVM
- The firmware (software) of MMDVM must be download on github platform.
https://github.com/g4klx/MMDVM - Download the ZIP file from the top right button

- Unzip MMDVM-master.zip file in a directory.
- Rename the directory to MMDVM
- Open the configuration file “Config.h” to match to my MMDVM filtering shield:
- Validate the 12 MHz external oscillator
#define EXTERNAL_OSC 12000000)
- Indicate the version of the MMDVM board
#define ARDUINO_DUE_NTH
- Inform the network of the signal level measured by the receiver
#define SEND_RSSI_DATA
- Validate pin assignment to install a Nextion touch screen
#define SERIAL_REPEATER
- Validate the 12 MHz external oscillator
/*
 *   Copyright (C) 2015,2016 by Jonathan Naylor G4KLX
 *
 *   This program is free software; you can redistribute it and/or modify
 *   it under the terms of the GNU General Public License as published by
 *   the Free Software Foundation; either version 2 of the License, or
 *   (at your option) any later version.
 *
 *   This program is distributed in the hope that it will be useful,
 *   but WITHOUT ANY WARRANTY; without even the implied warranty of
 *   MERCHANTABILITY or FITNESS FOR A PARTICULAR PURPOSE.  See the
 *   GNU General Public License for more details.
 *
 *   You should have received a copy of the GNU General Public License
 *   along with this program; if not, write to the Free Software
 *   Foundation, Inc., 675 Mass Ave, Cambridge, MA 02139, USA.
 */

#if !defined(CONFIG_H)
#define  CONFIG_H

// Allow for the use of high quality external clock oscillators
// The number is the frequency of the oscillator in Hertz.
//
// The frequency of the TCXO must be an integer multiple of 48000.
// Frequencies such as 12.0 Mhz (48000 * 250) and 14.4 Mhz (48000 * 300) are suitable.
// Frequencies such as 10.0 Mhz (48000 * 208.333) or 20 Mhz (48000 * 416.666) are not suitable.
//
// For 12 MHz
#define EXTERNAL_OSC 12000000
// For 12.288 MHz
// #define EXTERNAL_OSC 12288000
// For 14.4 MHz
// #define EXTERNAL_OSC 14400000
// For 19.2 MHz
// #define EXTERNAL_OSC 19200000

// Allow the use of the COS line to lockout the modem
// #define USE_COS_AS_LOCKOUT

// Use pins to output the current mode
// #define ARDUINO_MODE_PINS

// For the original Arduino Due pin layout
// #define ARDUINO_DUE_PAPA

// For the ZUM V1.0 and V1.0.1 boards pin layout
// #define ARDUINO_DUE_ZUM_V10

// For the SP8NTH board
#define ARDUINO_DUE_NTH

// To use wider C4FSK filters for DMR, System Fusion and P25 on transmit
// #define WIDE_C4FSK_FILTERS_TX
// To use wider C4FSK filters for DMR, System Fusion and P25 on receive
// #define WIDE_C4FSK_FILTERS_RX

// Pass RSSI information to the host
#define SEND_RSSI_DATA

// Use the modem as a serial repeater for Nextion displays
#define SERIAL_REPEATER

#endif
Download the ST library
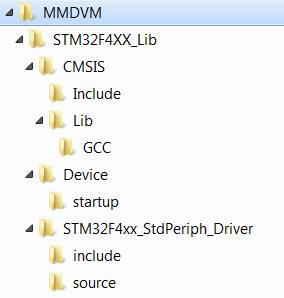
- Download the library STM32F4XX_Lib.zip
- Unzip the file
- Move all files and subdirectories into the MMDVM directory, before created
Download free compiler utility
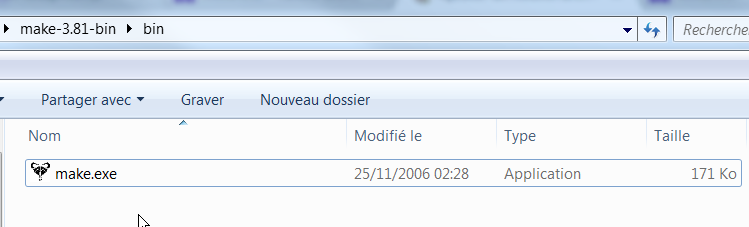
- Download the compressed file Binaries ZIP on https://gnuwin32.sourceforge.net/packages/make.htm (or directly here make-3-81-bin)
- Unzip the file
- Copy the make.exe file from bin subdirectorydu in MMDVM directory
Download Dependencies
- Download the dependencies ZIP file on https://gnuwin32.sourceforge.net/packages/make.htm (or directly here make-3-81-dep)
- Unzip the file
- Copy the following files from bin subdirectorydu in MMDVM directory
- libintl3.dll
- libiconv2.dll
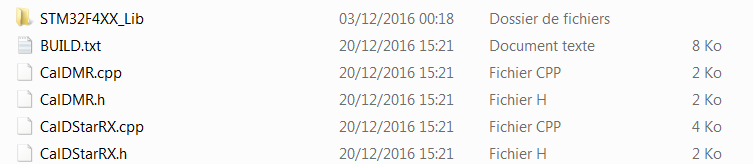
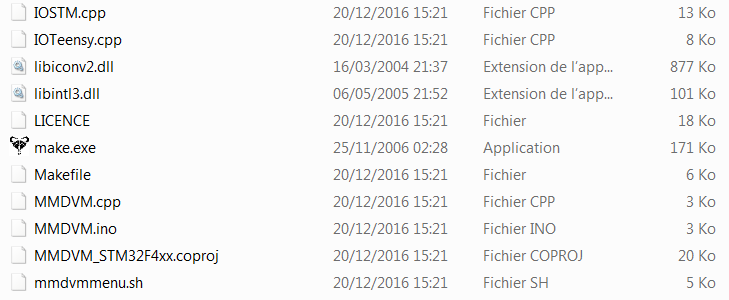
Here is an excerpt of the files contained at this stage in the MMDVM directory.
Download the integrated software suite for ARM
- Download the dedicated software for compilation of ARM electronic compotents on https://launchpad.net/gcc-arm-embedded/+download (or directly here gcc-arm-none-eabi-5_4-2016q3-20160926-win32.exe)
- Install the software with the default path
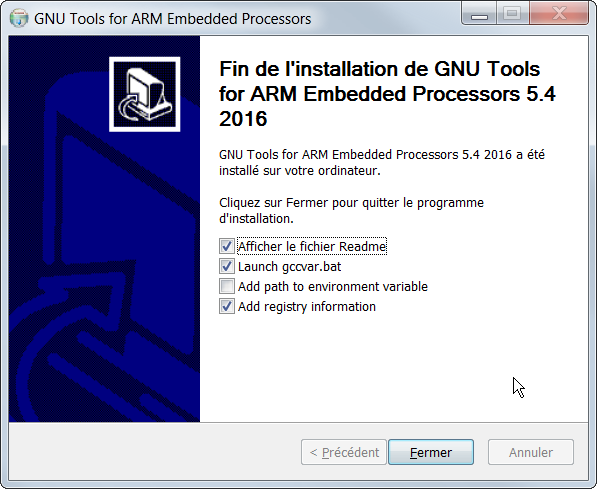
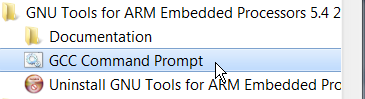
- Execute from the “GNU Tools for ARM Embedded Processors” t menu the “GCC Command Prompt” line
Start compilation
- From the command window (GCC Command Prompt), go to the MMDVM directory.
cd MMDVM
- Clear all traces of already compiled files
make clean
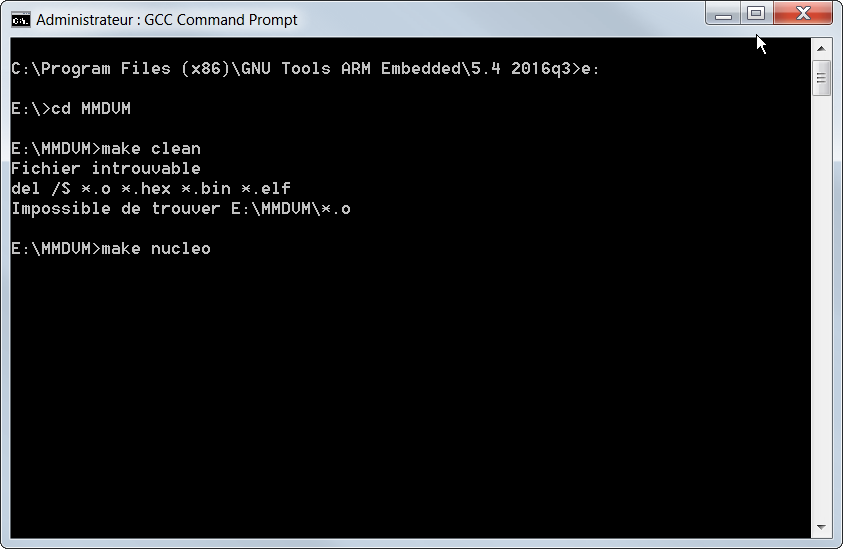
- Then for the nucleo STM32F446 board, start the compilation.
make nucleo
- If you have a Discovery STM32F407 board, start compilation
make dis
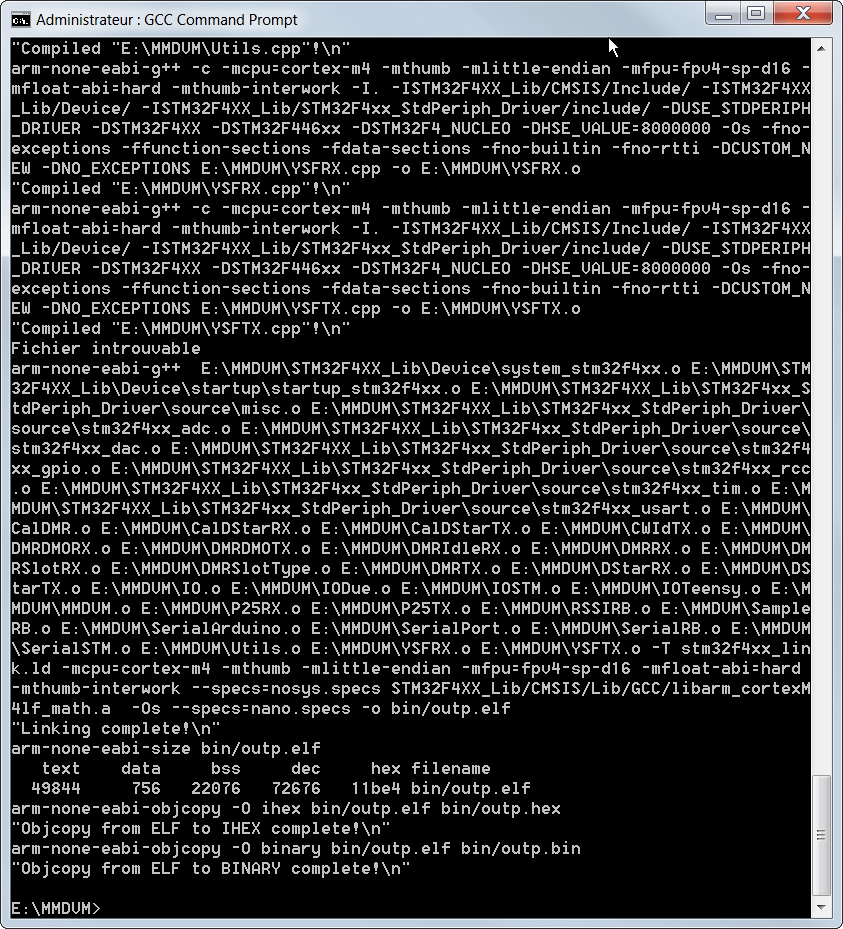
Compilation of MMDVM for STM32F446
The outp.hex and outp.bin files are available in the bin subdirectory and will now be loaded on the STM32F4xx.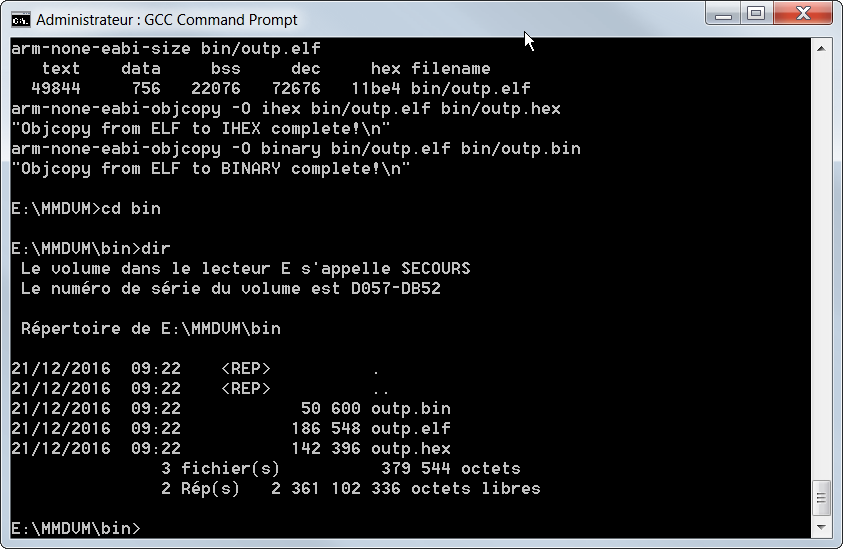
Download and program the STM32F4 board
- Download the programing software provided by the manufacturer ST Micro Electronics “STM32 ST-LINK Utility” (On the websiote of ST Micro Electronics You must submit your email address in order to receive the download link, or download it directly here en-stsw-link004.zip)
- Unzip
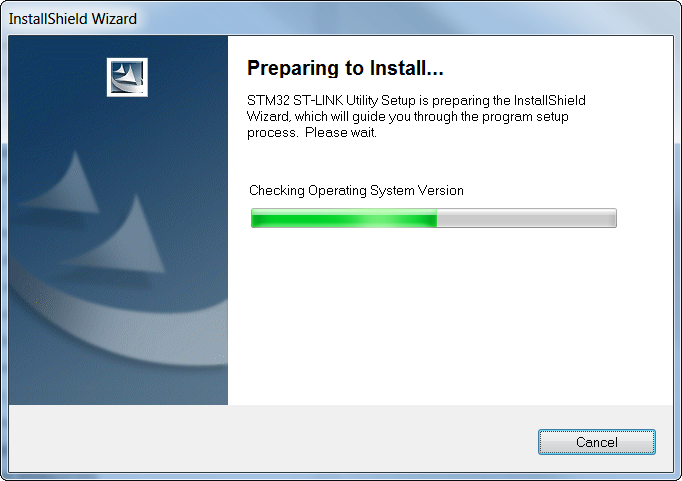
- Start intsllation of STM32 ST-LINK Utility
- Connect your board via USB cable to your PC
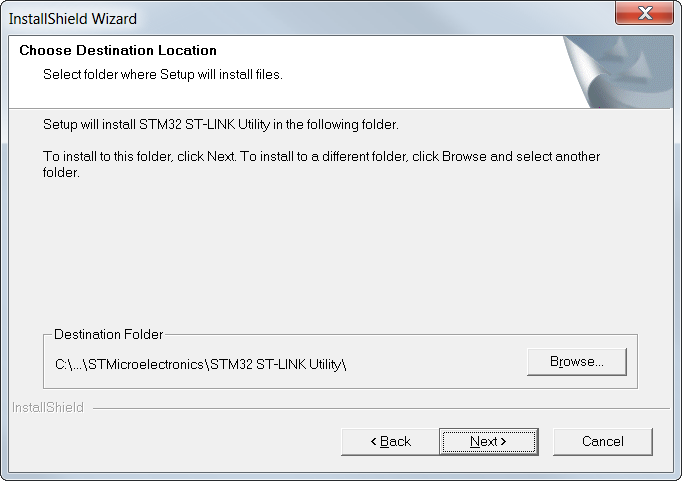
- The default installation destination is fine
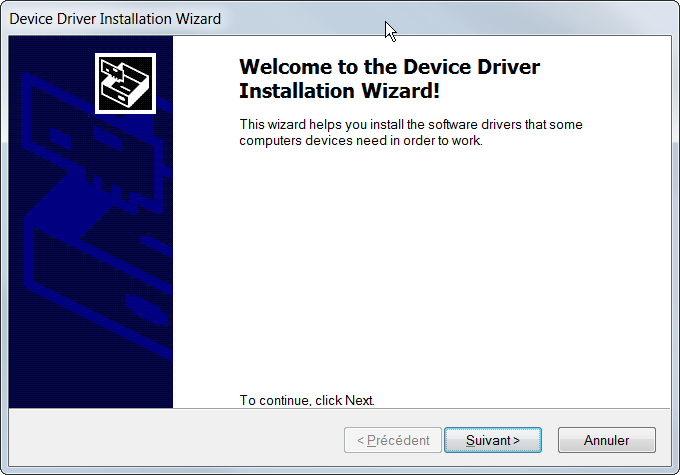
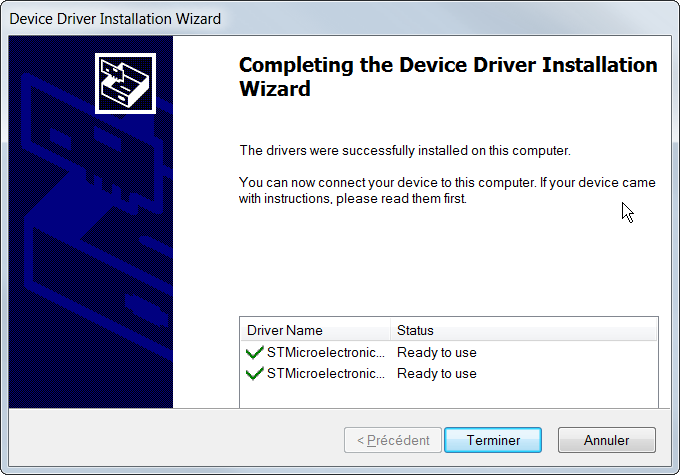
- The USB driver will also be installed, after a first click on Next
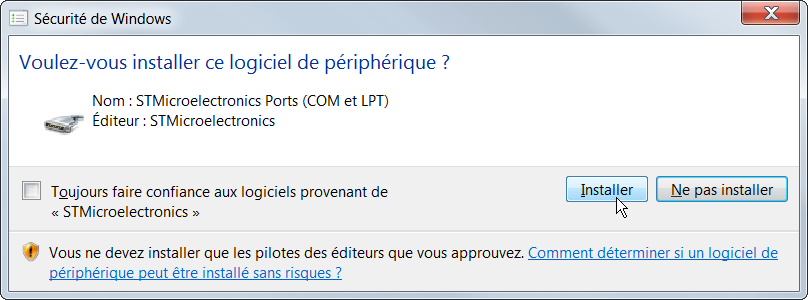
- Validate the installation of the USB drivers of the STM32 board by clicking the Install button (two times)

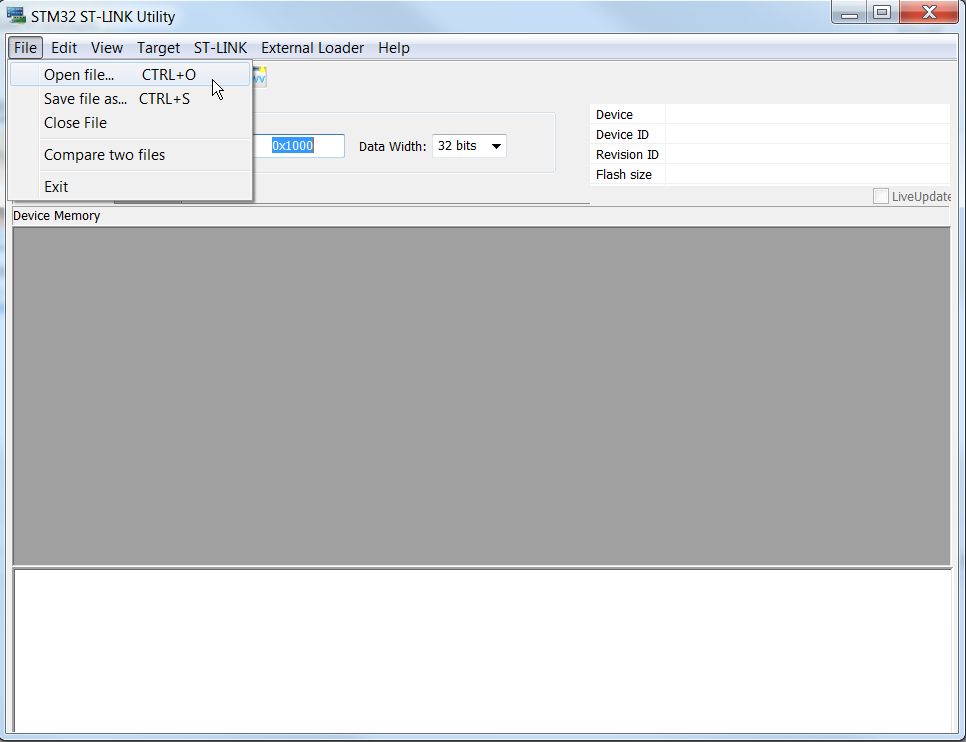
- Launch the STM32 ST-Link software available in the start menu
- Ouvrir le fichier compilé outp.hex (ou bien outp.bin) se trouvant dans le sous-répertoire bin\

- Connect the STM32F4xx board to one of your USB sockets.
- Start loading (programming) the board via the Target menu then Program & Verify (or by keyboard shortcut CTRL + P)
 The following window opens.
 - Click the Start button to start programming the STM32F4xx
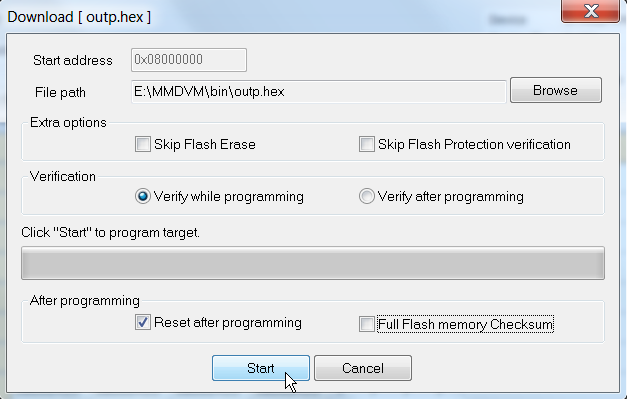
The console displays the correct execution “Verification…OK“
21:35:54 : [outp.hex] opened successfully.
21:35:54 : [outp.hex] checksum : 0x00406CE1
21:36:02 : ST-LINK SN : 0667FF535752877167095321
21:36:02 : ST-LINK Firmware version : V2J27M15
21:36:02 : Connected via SWD.
21:36:02 : SWD Frequency = 4,0 MHz.
21:36:02 : Connection mode : Normal.
21:36:02 : Debug in Low Power mode enabled.
21:36:02 : Device ID:0x421
21:36:02 : Device flash Size : 512KBytes
21:36:02 : Device family :STM32F446xx
21:36:06 : Memory programmed in 1s and 810ms.
21:36:06 : Verification...OK
21:36:06 : Programmed memory Checksum: 0x00406CE1
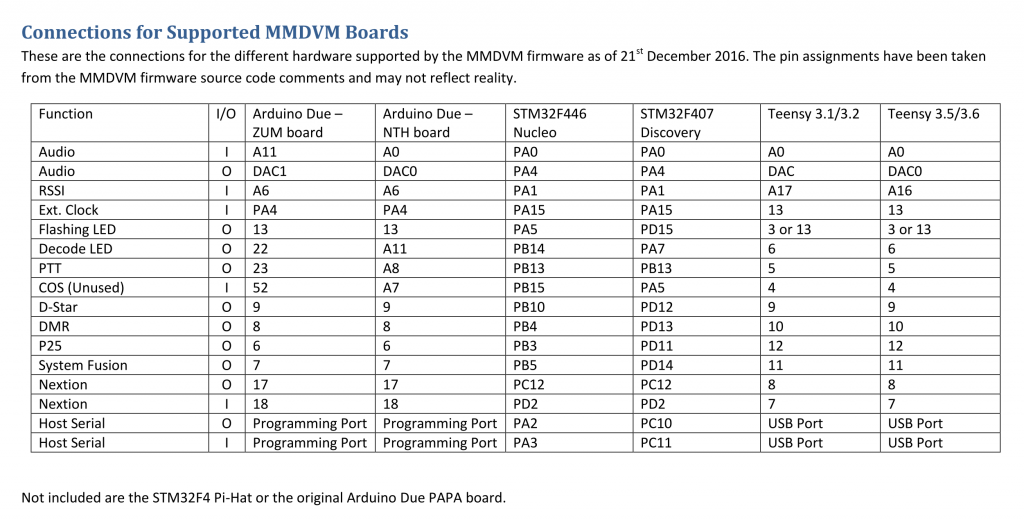
The MMDVM filter pinout
In the table below, you will find the pinout to follow according to the board. My previous MMDVM shield for Arduino uses the NTH definition.
Bonjour,
merci pour ce travail
au prompt “GCC Command Prompt” la commande “cd /MMDVM” ira direct au répertoire MMDVM
en mentionnant que le répertoire est dans C:/ (C:/MMDVM)
car le “E” n’est pas pour tout le monde?
si on branche le Nextion sur la carte STM32F446:
à priori pour le Nextion la programmation est bonne dans config.h
dans MMDVM.ini:
Port=modem
# Port=/dev/ttyAMA0
Désolé si je fais une erreur
73 de F1IZL
Bonjour Christian,
Merci pour le travail accompli sur le MMDVM. Que dire de la suite des réjouissances avec les cartes STM32F446RE, des nouveaux développements sur une nouvelle carte MMDVM ??
Merci pour le temps passé pour la communauté RA.
73
Bruno
(Translation by F5UII)
Hello Christian,
Thank you for the work on the MMDVM. What about the continuation of the revelry with the STM32F446RE boards, new developments on a new MMDVM are coming ??
Thanks for the time spent for the hamradio community.
73
Bruno
Bruno
Merci pour ces mots sympathiques et chaleureux…
En effet, une nouvelle platine de filtrage MMDVM est en cours de design, toujours avec un maximum de composants standards à pattes. Voici l’avant projet en image ci-dessous.
Les fonctions ajoutées par rapport à ma version Arduino Due :
– Interface radio sur 2 prises mini-DIN, commutable à 1 prise unique mini-DIN
– Interface radio sur connecteur 2,54mm et points de tests
– Force des signaux RSSI du récepteur
– 4 leds du mode de trafic actif (DMR, DSTAR, Yaesu Fusion System, P25)
– 1 led d’alimentation et 1 led de vie de MMDVM
– 1 connecteur pour écran LCD tactile Nextion
Je me demande s’il n’y a pas un intérêt à ajouter 4 trous de fixations à la platine afin de permettre un montage plus aisé de l’ensemble. Voir ici Sur twitter
(In english)
Bruno
Thank you for these warm and friendly words …
Indeed, a new MMDVM filter shield is being designed, always with a maximum of standard components (soldered on holes). Here is the pre-project image below.
The added functions compared to my version Arduino Due:
– Radio interface on 2 mini-DIN sockets, switchable to a single mini-DIN socket
– Radio interface on 2.54mm connector and test points
– Strength of receiver RSSI signals
– 4 active traffic mode LEDs (DMR, DSTAR, Yaesu Fusion System, P25)
– 1 power LED and 1 Live MMDVM LED
– 1 connector for Nextion touchscreen LCD
I wonder if there is no interest in adding 4 holes of fixings to the shield and STM32 board in order to allow easier assembly. View here on twitter
Bonjour Christian,
Pour répondre a ta question :
Le STM32F446 a 3 trous de fixation que l’on peut aisément utiliser. Comme la nouvelle carte MMDVM est enfichable sur le STM32F446 il faut juste pouvoir verrouiller l’ensemble.
Une correspondance entre les trous du STM32 et la carte MMDVM-F446.
73
F1PTL Bruno
(Translation)
Hello Christian,
To answer your question :
The STM32F446 has 3 mounting holes that can be easily used. Since the new MMDVM card can be plugged into the STM32F446, you just have to be able to lock the entire setup.
A match between the holes on the STM32 and the MMDVM-F446 is required.
73
F1PTL Bruno
Salut Bruno,
Merci de ton retour.
C’est ce que j’ai exactement prévu, les 3 trous existants sur la platine STM32F4 sont reportés avec les mêmes diamètres et aux mêmes positions sur la platine de filtrage MMDVM STM32F4xx. Le montage pouvant ainsi se faire également sur une face ou l’autre du circuit assemblé.
Il reste vrai qu’un des trous est difficilement exploitable car très proche d’un connecteur.
De plus les 3 trous ne sont pas forcément alignés… rendant les perçages du support obligatoires avec un gabarit.
73, Christian
(Translation)
Hi Bruno,
Thank you for your comment.
That’s what I planned, the 3 holes existing on the plate STM32F4 are transferred with the same diameters and the same positions on the filtering plate MMDVM STM32F4xx. The mounting can thus also be made on one face or the other of the assembled circuit.
It remains true that one of the holes is difficult to exploit because it is very close to a connector.
Moreover the 3 holes are not necessarily aligned … making the borings of the support with the aid of a template.
73, Christian
Bravo pour les belles images du futur système.
Du beau et bon travail, félicitations F1IZL
(Translation)
Bravo for the beautiful images of the future system.
Nice and good work, congratulations F1IZL
Merci Jean-Yves
Cela fait toujours plaisir
😉
(Translation)
Thank you Jean-Yves
It is always pleasant
😉
Nice work Christian! I have a STM32F446RE Nucleo and would like to buy your new filter-plate board for Nucleo. Either pcb ready made, or pcb with critical components. Is this possible?
73 de oh6xi
(Traduction)
Bon travail Christian! J’ai un STM32F446RE Nucleo et je voudrais acheter votre nouvelle plaque de filtrage pour Nucleo. Soit un PCB tout prêt, soit PCB avec des composants critiques. Est-ce possible?
73 de oh6xi
Hello Ulf,
Thank you for your message,
The PCB is actually in production. Before proposing the plate to interested people, I will have to test it.
I will than offer the possibility to have one for a few part only, extract from my future small stock. I may also provide the possibility to provide complet kit of components.
You can let your email on this page to be informed when a grouped purchase is open : https://shop.f5uii.net/
Here is the pictures of final design.
73, Christian
(Traduction)
Bonjour Ulf,
Merci pour votre message,
Le PCB est en production. Avant de proposer la platine aux personnes intéressées, je vais devoir la tester.
Je vais uniquement offrir la possibilité d’en avoir une pièce, à partir d’une petite quantité. Je pourrais également fournir la possibilité de fournir le kit complet des composants.
Vous pouvez laisser votre e-mail sur cette page pour être informé lorsqu’un achat groupé sera ouvert: https://shop.f5uii.net/
Voici les photos de la conception finale.
73, Christian
Please,
Can you do a manual, to update the stm32 but in Ubuntu?
Many Thanks.
(Translation F5UII)
S’il vous plait,
Pouvez-vous faire un guid de mise à jour du STM32 mais sous Ubuntu ?
Merci beaucoup
Joaquin,
I have for moment no interest for using Ubuntu. Maybe since you asked the question have you find a manual. Do not hesitate to share it here.
Thank you
(Translation)
Joaquin,
Pour le moment, n’est pas d’intéret à utiliser Ubuntu. Peut être que depuis que vous avez posé la question avez vous trouver un guide. N’hésitez pas de le partager ici
Merci
Bonjour
je viens de monter le modem mmdvm et j’ai un petit probleme
quand je lance depuis le raspberry le mmdm.ini j’ai l’information suivante
unable to read the firmware version after six attempts
pour info le modem est mis sur un nucleo F401RE
si vous avez une réponse à mon probleme ?
73s
jean paul F1BWT
(Translation)Hello
I have just mounted the modem mmdvm and I have a small problem
When I run from the raspberry the mmdm.ini I have the following information
Unable to read the firmware version after six attempts
For info the modem is put on a nucleo F401RE
If you have an answer to my problem?
73s
Jean paul F1BWT
Bonjour Jean-Paul,
Je n’ai pas testé la config avec cette version de platine Nucleo.
Ce message indique que la communication série entre le Raspberry Pi et la platine modem MMDVM (le Nucleo) ne fonctionne pas.
Il vous faut avoir :
– Compiler et charger votre nucleo avec le firmware (comme indiqué sur ce tutoriel)
– Je suppose que vous avez raccorder en USB la platine modem nucleo avec le Raspberry pi. Vérifiez que le port série est vu sur le raspberry (
ls /dev/ttyACM0).– Finalement dans MMDVM.ini vérifier que vous avez bien avoir spécifier ce port série pour acceder au modem
[Modem]Port=/dev/ttyACM0
Voila pour mes premiers conseils basiques.
(Translation)
Hello Jean-Paul,
I have not tested the config with this version of Nucleo board.
This message indicates that serial communication between the Raspberry Pi and the MMDVM modem (the Nucleo) does not work.
You must have:
– First Compile and load your nucleo with the firmware (like indicated on this tutorial)
– I guess you have to connect in USB the modem nucleo with the Raspberry pi. Verify that the serial port is seen on the raspberry (
ls /dev/ttyACM0).– Finally in MMDVM.ini check that you have correctly specified this serial port to access the modem
[Modem]Port =/dev/ttyACM0
Here is my first basic advice.
Bonjour
merci pour votre réponse
le nucleo a été bien chargé
le port série est bien vu sur le raspberry et le port est bien en ttyACM0
voici la
config.hque j(ai mis#define EXTERNAL_OSC 12288000#define ARDUINO_MODE_PINS
#define STM32F4_NUCLEO_MORPHO_HEADER
#define SEND_RSSI_DATA
voila pour la config
73.s
jean paul F1BWT
(Translation)
Hello
thank you for your reply
The nucleo was well loaded
The serial port is well seen on the raspberry and the port is well in ttyACM0
Here is the
config.hthat i put#define EXTERNAL_OSC 12288000#define ARDUINO_MODE_PINS
#define STM32F4_NUCLEO_MORPHO_HEADER
#define SEND_RSSI_DATA
Here for the config
73.s
Jean paul F1BWT
Cela m’a l’air d’être correct coté du
Config.hdu modem MMDVM. Cela correspond précisément à ma configuration (j’ai également validé pour l’écran Nextion#define SERIAL_REPEATER). Je suppose que le même phénomène est constaté lorsque vous cherchez à lancer le logiciel de calibration avec la ligne de commandesudo /opt/MMDVMCal/MMDVMCal /dev/ttyACM0.La Led Live doit clignoter lentement à la mise sous tension du STM32 (alimenté par l’USB connecté au Raspberry Pi), et rapidement au démarrage de MMDVMHost, communication établie.
(Translation)
This seems to be correct on the MMDVM modem
Config.h. This corresponds precisely to my configuration (I also validated for the Nextion display#define SERIAL_REPEATER). I guess the same thing happens when you’re trying to run the calibration software with the command linesudo /opt/MMDVMCal/MMDVMCal /dev/ttyACM0.The Live LED should flash slowly when the STM32 power is turned on (powered by the USB connected to the Raspberry Pi), and quickly when MMDVMHost starts, communication established.
Bonsoir
j’ai lancé mmdvmcal est j’ai:
No reponse from the modemje reçois un 446re demain et je ferais l’installation dessus
73.s
jean paul
(Translation)
Good evening
I have started mmdvmcal and then:
No response from the modemI will get a 446re tomorrow and I would then reinstall on it
73.s
Jean Paul
Bonjour
je viens de recevoir le F446re et je l’ai chargé.
Tout fonctionne.
Donc c’est le F401re qui ne convenait pas.
73.s
Jean paul F1BWT
(Translation)
Hello
I have just received the F446re and I have loaded it.
everything is working
Therefore the F401re which was not suitable
73.s
Jean paul F1BWT
Bonjour,
Voilà une bonne nouvelle ! On aura donc appris que la version Nucleo STM32F401RE ne fonctionne pas en tant que modem MMDVM.
Merci Jean-Paul, et bons réglages !
(Translation)
Hello,
That’s good news! It will be learned that the Nucleo STM32F401RE version does not work as a MMDVM modem.
Thank you Jean-Paul, and good MMDVM tuning!
bonjour
un petit problème de ptt
j’ai installer un ecran nexion (bien pratique)
quand sur l’ecran s affiche DMR ou fusion la led ptt s allume
et quand disparait DMR ou FUSION la led reste allumer en permanence ?
avez vous rencontrer le probleme?
73.s
jp F1BWT
(Translation)
Hello
A little problem of ptt
I have installed a screen nexion (handy)
When the display shows DMR or merge the led ptt s lights
And when DMR or FUSION disappears, the LED remains on permanently?
Have you encountered the problem?
73.s
Jp F1BWT
Bonjour Jean-Paul,
Non pas de soucis de Led du Mode qui reste allumée. Et la LED PTT reste allumée, l’émetteur en émission ?
Vérifier que le signal en sortie de TCXO évolue entre 0 et 3.3V. Si le zéro n’est pas présent (tension plus haute), je vous invite à court-circuiter C22. Cela devrait régler cela.
(Translation)
Hello Jean-Paul,
No worries here about Mode Led that stays on. For you, the PTT LED stays on, the transmitter in emission?
Check that the signal output from TCXO is between 0 and 3.3V. If zero is not present (higher), I invite you to short circuit C22. That should fix that.
bonsoir
oui quand la led ptt est allumée la sortie ptt est active.
demain je regarderais la sortie du tcxo à l’oscillo.
bonne soirée
jean paul F1BWT
(Translation)
Good evening
Yes when the led ptt is lit the output ptt is active.
Tomorrow I would watch the exit of the tcxo to the oscillo.
good night
Jean paul F1BWT
Bonjour,
Je suis nouveau dans le numérique DMR, j’essaye de compiler les logiciels pour intégrer une carte MMDVM sur une Nucleo-64 et j’ai une erreur de compilation sous W 64 dont je vous joint une image .jpg en pièce jointe .
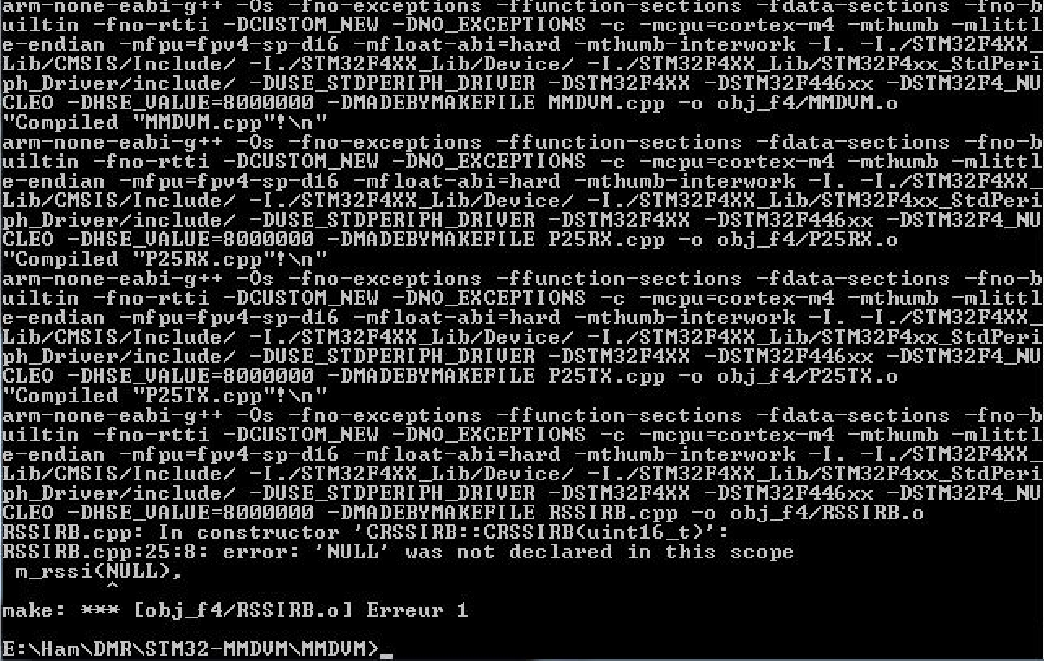
Avez vous déjà eu ce problème ?
J’ai fait du C sous UNIX et Linux mais il y a bien longtemps …
Merci de votre éclaircissement
Bien cordialement
Pierre-François, F5BQP
(Translation)
Hello,
I’m new on DMR digital, I’m trying to compile software to integrate an MMDVM board on a Nucleo-64 and I have a compilation error on W64 and I’m attaching a. jpg image to it.
Have you ever had this problem?
I did C under UNIX and Linux but a long time ago…
Thank you for your clarification
Yours sincerely
Pierre-François, F5BQP
Bonjour Pierre-François,
J’ai trouvé cette information sur github pour le même problème [ NULL non déclaré m_rssi(NULL) ]: https://github.com/g4klx/MMDVM/issues/116
Les différents fichiers sont bien positionnés dans le répertoire (un sous-répertoire MMDVM/STM32F4XX_Lib existe)?
73
(Translation)
Hello Pierre-François,
I found this information on github for the same problem [ NULL non déclaré m_rssi(NULL) ]: https://github.com/g4klx/MMDVM/issues/116
Are the different files well positioned in the directory (a folder name MMDVM/STM32F4XX_Lib is existing ?)
73
Bonjour Christian,
Merci pour les informations, j’ai réussi à compiler après ajout de la définition NULL dans la librairie ST .
Je n’étais pas au fait de ce forum GitHub .
Cordiales 73’s
Pierre-François, F5BQP
(Translation)
Hello Christian,
Thanks for the information, I managed to compile after adding the NULL definition in the ST library.
I wasn’t aware of this GitHub forum.
73
Pierre-François, F5BQP
Bonjour,
En suivant la méthode décrite ici : https://www.f5uii.net/en/compilation-installation-configuration-mmdvm-stm32f4xx/ , je rencontre l’erreur suivante :
E:\Radio\DMR\MMDVM_STM32\MMDVM-master>make clean/usr/bin/sh: del: command not found
make: *** [clean] Error 127
Le software suite for ARM a été installée en conservant le path par defaut (
c:/ProgramFiles)J’ai oublié quelque chose ?
73
Jeff, F5BCB
(Translation)
Hello,
Following the method described here: https://www.f5uii.net/en/compilation-installation-configuration-mmdvm-stm32f4xx/, I encounter the following error:
E:\Radio\DMR\MMDVM_STM32\MMDVM-master>make clean/usr/bin/sh: del: command not found
make: *** [clean] Error 127
The software suite for ARM has been installed with the default path (
c: /ProgramFiles)Did I forget something?
73
Jeff, F5BCB
Jeff,
Es-tu sûr de lancer GCC en administrateur ?

Je n’ai aucun soucis d’interprétation de la commande
delde mon coté.73
(Translation)
Jeff,
Are you sure you’re running GCC as administrator?

I have no problem interpreting the command
delon my side.73
Christian,
J’ai essayé en démarrant GCC en admin, puis en me plaçant dans le repertoire où est Make mais j’ai le même résultat.
Je précise que je suis sou W7 et que le répertoire bin de GCC est dans le path
Sinon, comment faire pour coller une copie d’écran ou une capture dans le forum ?
Jeff
(Translation)
Christian,
I tried starting GCC in admin, then placing myself in the directory where Make is but I have the same result.
I point out that I’m under W7 and that the bin directory of GCC is in the path
Otherwise, how do I paste a screenshot or capture into the forum?
Jeff
Curieux, de mon coté, cela fonctionne et aucun élément n’est ajouté au
PATH.Pour le moment, je ne vois pas comment t’aider…
Tu peux tout de même poursuivre pour voir. Car l’étape
cleansert à supprimer les précédentes compilations. Et pour le moment, tu n’en as pas réalisée.Pour copier depuis une fenêtre DOS, clic droit,
Sélectionnerpuis toucheENTREE.(Translation)
Curiously, on my side, it works and no element is added to the
PATH.For the moment, I don’t see help you more…
You can still continue to see. Because the step
cleancode>is used only to delete the previous compilations. And so far, you haven’t realized it.To copy from a DOS window, right-click,
Selectthen pressENTER.J’ai réussi à compiler et flasher le code avec une machine W7 32bits.
Sur une plateforme W7 /64, je n’y suis jamais parvenu malgré tous les essais que j’ai pu faire.
73,
Jeff, F5BCB
(Translation)
I managed to compile and flash the code with a 32-bit W7 machine.
On a W7 /64 platform, I never managed to do it despite all the tests I could do.
73,
Jeff, F5BCB
Thanks for you great design and I printed some of you board, after assembled all the components I starting compiling the MMDVM firmware, however there’s something confusing me in the config.h file, firstly I’m using the fox924b-12.288 as tcxo, so I should un-mark the 12288000 as EXTERNAL_OSC, right? Secondly it seems MMDVM firmware already supported STM32F4_NUCLEO boards, but only for STM32F446RE chip? I tried to upload the hex file to my STM32F411RE board, it’s not working as expected, the live led will not blinking after I connected the board to my Linux PC. I’ve tested the LEDs by controlling the GPIO directly and it works fine, so any suggestions of how to debug it? Thanks a lot.
73 DE BI4SQM
(Traduction)
Merci pour votre excellent travail de conception et j’ai imprimé certaines de vos cartes, après avoir assemblé tous les composants j’ai lancé la compilation du firmware MMDVM, mais il y a quelque chose qui me déroute dans le fichier config.h, tout d’abord j’utilise le fox924b-12.288 comme tcxo, donc je devrais décocher le 12288000 comme EXTERNAL_OSC, non? Deuxièmement, il semble que le firmware MMDVM supporte déjà les cartes STM32F4_NUCLEO, mais seulement pour la puce STM32F446RE? J’ai essayé de télécharger le fichier hexadécimal sur ma carte STM32F411RE, ça ne fonctionne pas comme prévu, la led live ne clignotera pas après que j’ai connecté la carte à mon PC Linux. J’ai testé les LEDs en contrôlant directement le GPIO et il fonctionne bien, donc si vous avez des suggestions sur la façon de le déboguer? Merci infiniment.
73 DE BI4SQM
Hello, Jin,
Yes, before compiling, put these lines in config. h
#define EXTERNAL_OSC 12288000#define ARDUINO_MODE_PINS
#define STM32F4_NUCLEO_MORPHO_HEADER
#define SEND_RSSI_DATA
Concerninf the F401RE board, I don’t know how to answer it. But as you can read in F1BWT comments, these tests with a STM32F401RE show that unfortunately this does not work with this model.
73 !
(Traduction)
Bonjour Jin,
Oui, avant de compiler, mettre ces lignes dans config.h
#define EXTERNAL_OSC 12288000#define ARDUINO_MODE_PINS
#define STM32F4_NUCLEO_MORPHO_HEADER
#define SEND_RSSI_DATA
Concernant le F401RE a vrai dire, je ne sais pas y répondre. Mais comme vous pouvez le lire dans les commentaires de F1BWT, ces essais avec une STM32F401RE montrent que cela ne fonctionne malheureusement pas.
73!
I just got the response from github and it says that:
“The only STM32 parts supported are: STM32F407, STM32F446, STM32F722 and STM32F767.”
I think there’s some key features that MMDVM firmware used but 411 board don’t have, not sure what are they right now.
I guess I have no choice but to buy one of those boards which supported by firmware. And again thanks for you great design.
73, BI4SQM
(Traduction)
Je viens d’avoir la réponse de Github et ça dit ça:
“Les seules pièces STM32 supportées sont: STM32F407, STM32F446, STM32F722 et STM32F767.”
Je pense qu’il y a quelques fonctionnalités clés que le micrologiciel MMDVM a utilisé mais que la carte 411 n’ a pas, je ne sais pas trop ce qu’ils sont en ce moment.
Je suppose que je n’ai pas d’autre choix que d’acheter une de ces cartes qui est supportée par le firmware. Et encore merci pour votre superbe design.
73, BI4SQM
When I have to write the firmware and I have to change the version of the MMDVM at Config.h which one should I use my mmdvm is v6.2 for the core-f446re
Thanks
Mauro Abrantes
(Traduction)
Quand j’ai à écrire le firmware et que je dois changer la version du MMDVM à Config.h lequel dois-je utiliser mon mmdvm est v6.2 pour le core-f446re
Merci
Mauro Abrantes
Je ne comprends pas bien la question. Version dans config.h ?
Les paramètres du fichier config.h pour fonctionner avec la platine STM32 F446RE sont ceux indiqués plus haut dans les commentaires.
#define EXTERNAL_OSC 12288000#define ARDUINO_MODE_PINS
#define STM32F4_NUCLEO_MORPHO_HEADER
#define SEND_RSSI_DATA
(Translation)
I don’t quite understand the question. Version in config. h?
The settings in the config. h file for operating with the STM32 F446RE board are those given in the comments above.
#define EXTERNAL_OSC 12288000#define ARDUINO_MODE_PINS
#define STM32F4_NUCLEO_MORPHO_HEADER
#define SEND_RSSI_DATA
Yes, before compiling, put these lines in config. h
#define EXTERNAL_OSC 12288000#define ARDUINO_MODE_PINS
#define STM32F4_NUCLEO_MORPHO_HEADER
#define SEND_RSSI_DATA
This work in my case.
(Traduction)
Oui, avant de compiler, j’ai placé ces lignes dans la configuration. h
#define EXTERNAL_OSC 12288000#définir ARDUINO_MODE_PINS
#define STM32F4_NUCLEO_MORPHO_HEADER
#define SEND_RSSI_DATA
Ça marche dans mon cas.
Thanks for all support is working now.
Mauro KC1DX
(Traduction)
Merci pour tout le support, cela fonctionne maintenant.
Mauro KC1DX
hello guys
anybody can post your mmdvm.ini file for nucleo, please
thank you and 73
(Traduction)
Bonjour les gars
n’importe qui peut poster son fichier mmdvm. ini pour nucleo, s’il vous plaît.
merci et 73
Have a look on the upper comment, of course you have to indicate the correct frequency of your TCXO.
(Traduction)
Jetez un coup d’oeil sur le commentaire au-dessus, bien sûr vous devez indiquer la fréquence correcte de votre TCXO.
STM32F407VGT6 or STM32F407G-DISC1: I LIKE KNOW IF THIS VERSION WORK WITH MMDVM NTH ???
(Traduction)
STM32F407VGT6 or STM32F407G-DISC1: J’AIME SAVOIR SI CETTE VERSION FONCTIONNE AVEC MMDVM NTH ???
Hello Christian.
Which definitions should I use for the correct configuration in config.h for your Nucleo plate for the current version of MMDVM currently placed on https://github.com/g4klx/MMDVM ?
#define ARDUINO_MODE_PINSdoes not work.After programming with
#define MODE_LEDS,#define MODE_PINS, there is a reception problem. The signal on CN7-28 (PA0) is correct. There is also no response to RADIO-SQL. All LEDs are lit during the start. Later LIVE flashes quickly (as it should). PTT and DMR light up when beacon is transmitted. The signals on the transmitter are. I can not start the reception.73
Rafal.
(Traduction)
Bonjour Christian.
Quelles définitions dois-je utiliser pour la configuration correcte dans config.h pour votre plaque Nucleo pour la version actuelle de MMDVM actuellement placée sur https://github.com/g4klx/MMDVM ?
#define ARDUINO_MODE_PINSne fonctionne pas.Après avoir programmé avec
#define MODE_LEDS,#define MODE_PINS, il y a un problème de réception. Le signal sur CN7-28 (PA0) est correct. Il n’y a pas non plus de réponse à RADIO-SQL. Toutes les LEDs sont allumées pendant le démarrage. Plus tard, LIVE clignote rapidement (comme il se doit). Les PTT et DMR s’allument lorsque la balise est transmise. Les signaux sur l’émetteur sont. Je ne peux pas démarrer la réception.73
Rafal.
Rafal,
you have to enable STM32F4 board in
Config.hbefore compiling.// For ST Nucleo-64 STM32F446RE board#define STM32F4_NUCLEO_MORPHO_HEADER
The SQL led will only light on decoding RF, not only when RF signal is present.
73
(Traduction)
Rafal,
vous devez activer la carte STM32F4 dans
Config.havant de compiler.// For ST Nucleo-64 STM32F446RE board#define STM32F4_NUCLEO_MORPHO_HEADER
La led SQL ne s’allumera que sur le décodage RF, et pas seulement lorsque le signal RF est présent.
73