In the following of my pedagogical articles on MMDVM, I offer you this time a tutorial explaining step by step how to add a Nextion (itead) screen on your MMDVM repeater.
Initial programming of the Nextion screen
Software prerequisites
We need to add the serial module to the python language
sudo apt-get install python-serial
Configuring the serial port /dev/ttyAMA0
Disable access to the console via the serial port. (You are logged in by another means).
sudo raspi-config

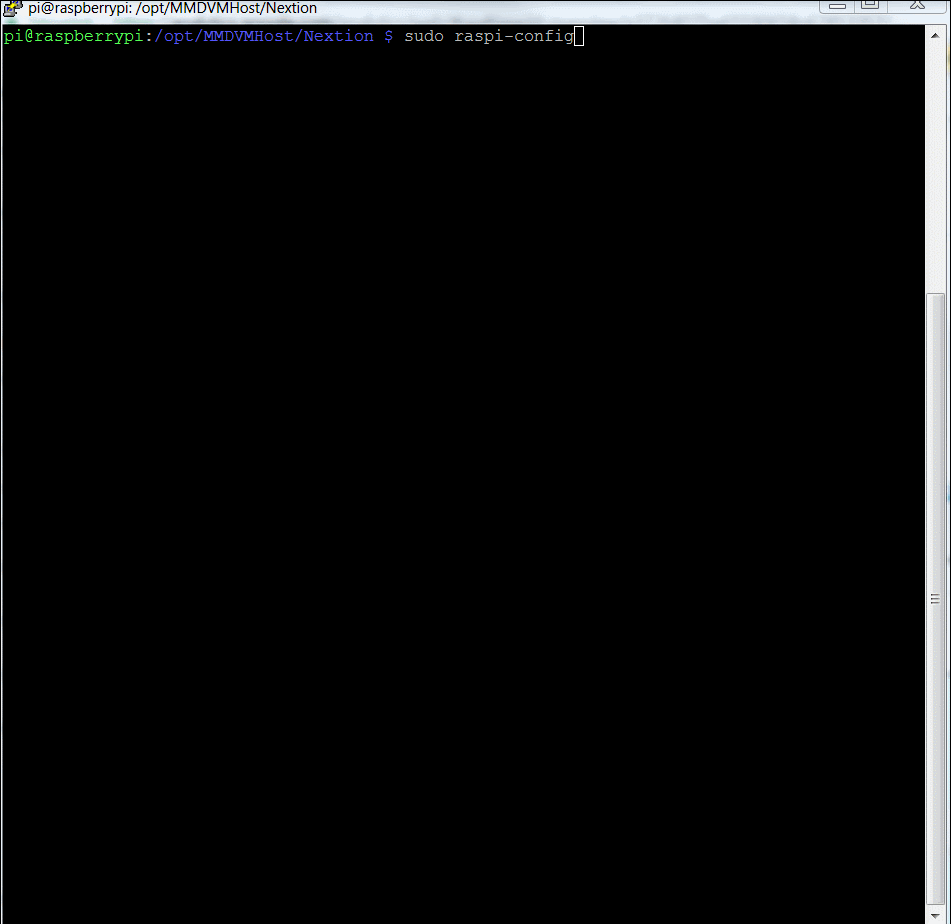
Configure the serial port and restart the Raspberry Pi
Connecting the Display
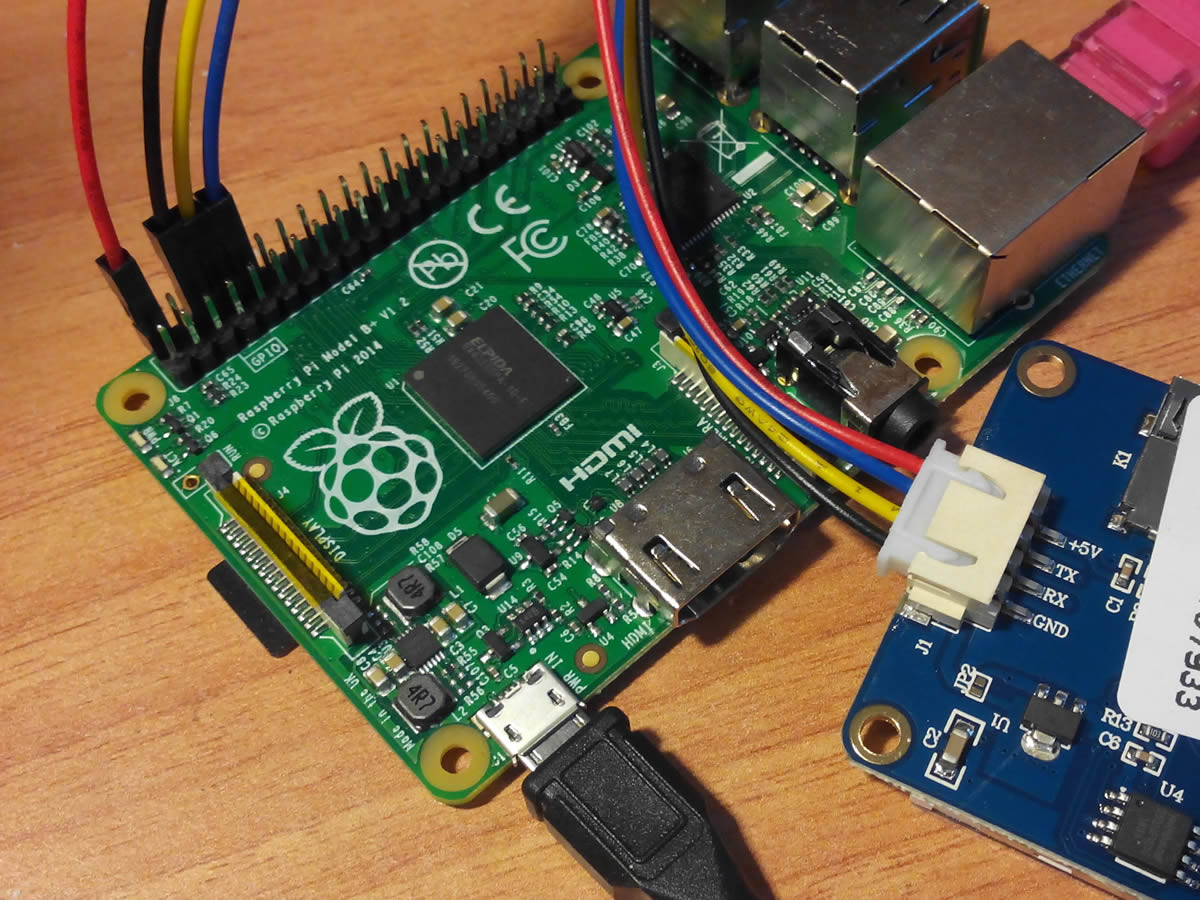
The screen must now be connected to the serial port (called UART) of the Raspberry Pi, in order to be able to program it in the next step.
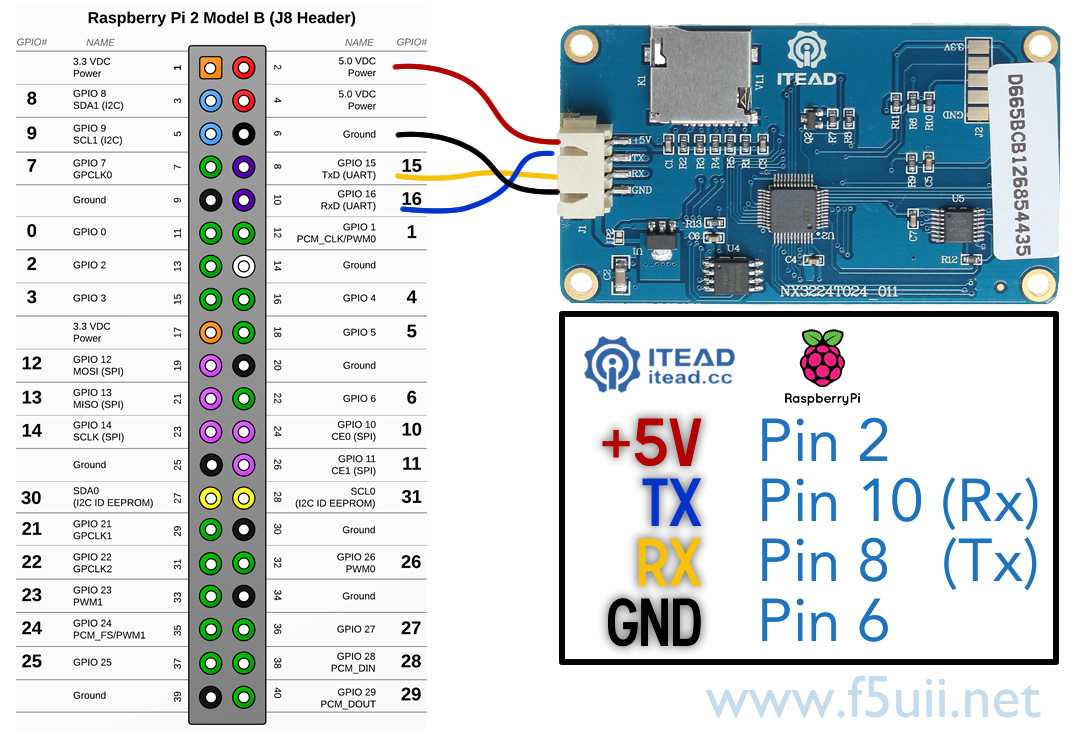
Raspberry Pi (GPIO) wiring to program of Nextion Screen

First select the file you will load according to your screen. Consult the reference written on the back of your screen. In the case of our example, the screen is labeled NX3224T024_011. We will identify the file name with the following commands
cd /opt/MMDVMHost/Nextion
ls
ls *24T024*
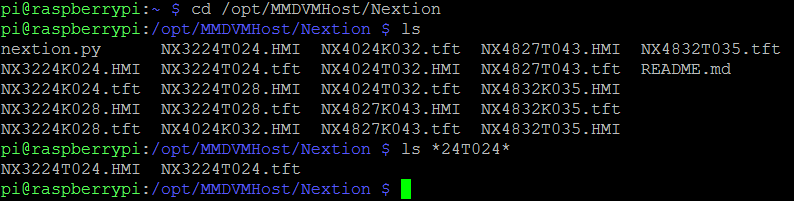

We find two files corresponding to this screen. The .HMI file is the native format. The .tft file is the compiled binary file that will be loaded on the screen in the next step.
We will now load the file with the supplied nextion.py python program. The first parameter is the name of the tft file to load, the second parameter is the target serial port.
sudo python nextion.py NX3224T024.tft /dev/ttyAMA0
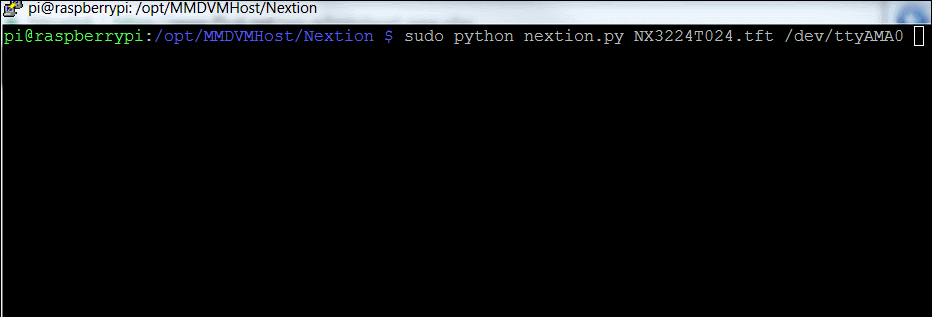
The display lights up. The MMDVM logo appears.
Connecting and configuring MMDVM
Choice of connection
There are two ways to connect your Nextion screen:
- To the Raspberry Pi, connected identically to what was indicated below for the programming part
- To the MMDVM filter card (Arduino or STM32, or other …)
We will explain both ways of proceeding. You have to choose the solution you want to implement
The Nextion screen on Raspberry Pi
We must validate the operation of the screen by modifying the configuration file MMDVM.ini
sudo nano /opt/MMDVMHost/MMDVM.ini
At the beginning of the file, in [General] section we will specify the screen.
[General]
Callsign=F5ZKS
Timeout=600
Duplex=1
# ModeHang=10
RFModeHang=10
NetModeHang=3
Display=Nextion
#Display=None
Daemon=0
And we verify that the [Nextion] section specifies the serial port used
[Nextion]
# Port=modem
Port=/dev/ttyAMA0
Brightness=50
DisplayClock=1
UTC=0
IdleBrightness=20
We save the modified file (Ctrl-X), and Yes
We restart the Raspberry Pi
sudo reboot
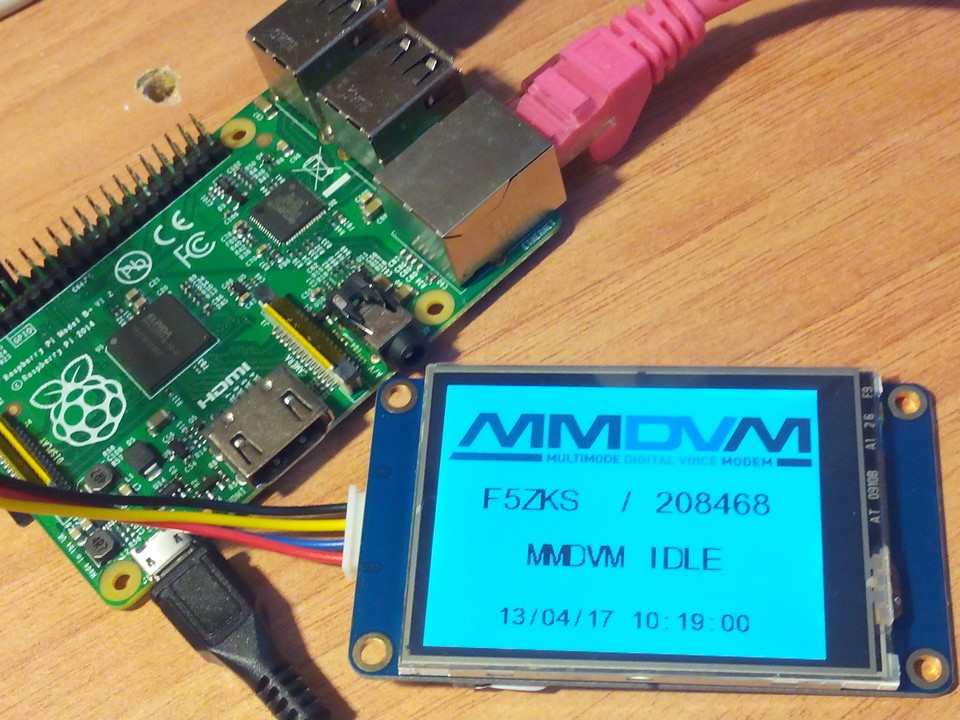
The display lights up and indicates that MMDVM is ready (Idle). The repeater callsign and ID are displayed.
Nextion screen on the MMDVM filtering board
We are now explaining the second way to connect the screen, directly to the MMDVM filtering modem
MMDVM Firmware Configuration
Note that for details on the firmware upgrade process, please refer to MMDVM installation on a STM32F4xx board .
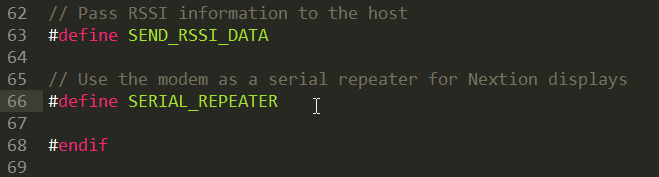
We modify the config.h firmware configuration file, validating the serial port for the Nextion display (SERIAL_REPEATER), at the end of the file.

Then you recompile MMDVM firmware (see “Start compilation” in MMDVM installation on a STM32F4xx board).
We reload the target (with STM32 utility for Nucleo for example, see MMDVM installation on a STM32F4xx board).
Configuring MMDVMHost
We now specify in MMDVM.ini file so that the Nextion screen is connected to the MMDVM modem.
sudo nano /opt/MMDVMHost/MMDVM.ini
[Nextion]
Port=modem
#Port=/dev/ttyAMA0
Brightness=50
DisplayClock=1
UTC=0
IdleBrightness=20
In the [General] section, the screen is specified as Nextion.
[General]
Callsign=F5ZKS
Timeout=600
Duplex=1
# ModeHang=10
RFModeHang=10
NetModeHang=3
Display=Nextion
#Display=None
Daemon=0
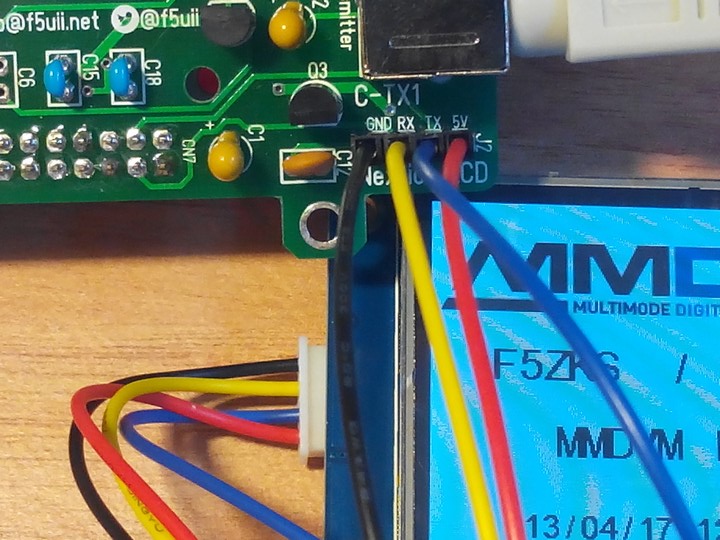
Connecting the display to the MMDVM modem
Plug into the MMDVM Nucleo STM32 shield as shown on the picture below.
We restart the Raspberry Pi
sudo reboot
Your display is operational.
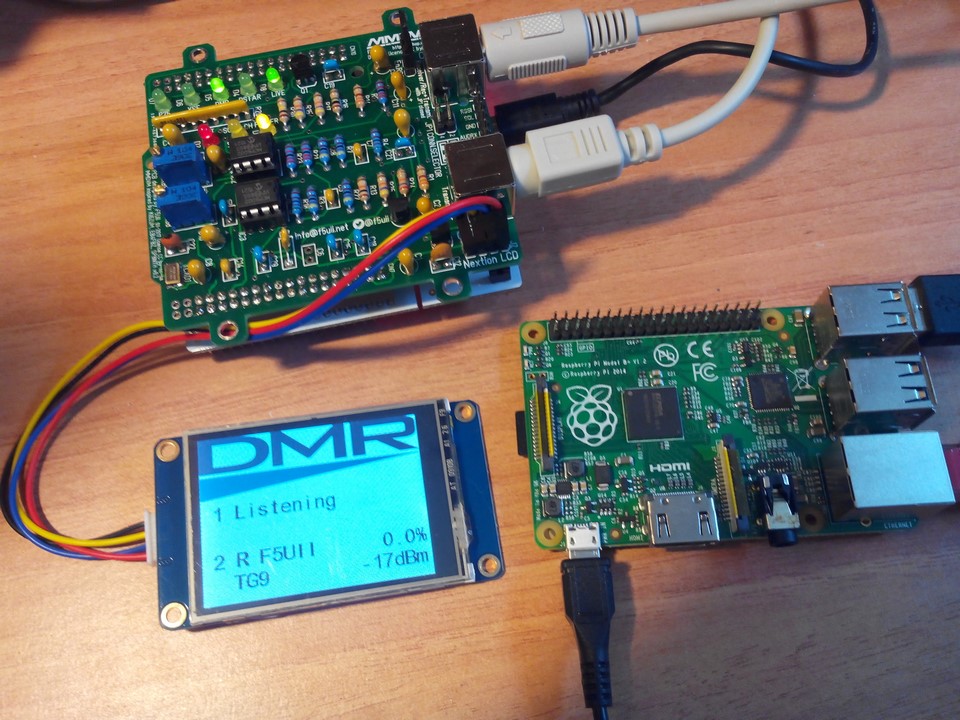
MMDVM modem, on Nucleo STM32F4, iTead Nextion screen and Raspberry Pi
Do not hesitate to use comments to ask some needed help.