
Intro
In my last article dedicated to amateur digital television, I had the opportunity to present step by step how to make your first DATV picture broadcasts. In this new article, I propose to focus on the implementation of a small box, an H.265/H.264 video encoder. It offers the possibility to those who are equipped with a computer without a “modern” graphics card unable to encode in H.265 to still be able to transmit with this H265 “compression”.
In this article, and as usual, we will go step by step through all the operations described as precisely as possible. This article is “multi-page”, to browse from one page to another or directly from the contents page to the desired page.
In the previous article, I had the opportunity to explain that the digital rate transmitted to the transmitter is dependent on the characteristics of the radio signal that will be transmitted: Mainly its spectral width (or the number of kilo symbols) and the correction factor (FEC). If this doesn’t tell you much, I invite you to (re)read this article to clarify these important notions in DATV.
H.265 encoding (or MPEG-4 HEVC for High Efficiency Video Coding) is a much more powerful video encoding and compression process than H.264. Thanks to its algorithm that increases the static areas in the image and “tightens” the compression mesh, the H.265 encoder is able to save up to 70-80% bandwidth for the same quality as H.264 encoding.
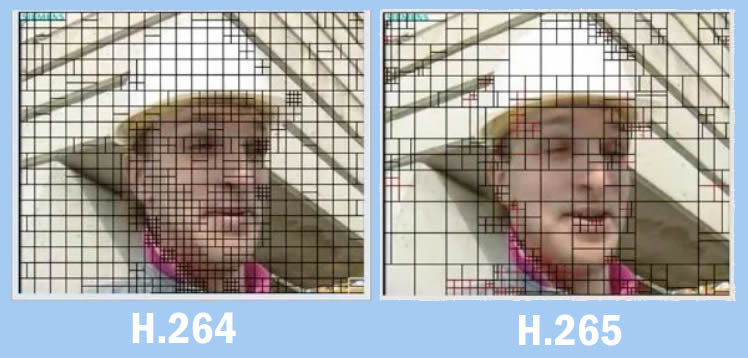
On the image above, we can see that there are globally less squares on the right image, encoded in H.265 than on the left image. It is this economy of uniform areas that increases the data rate useful for transmitting an image. On the other hand, if we consider that we want to use the entire available bit rate, we will then be able to improve image quality, by avoiding blurring during rapid image movement, or else be able to increase the definition of the video sent.
On the other hand, H.265 encoding is only available on some recent graphics cards. Some third-generation Nvidia cards integrate an NVENC H.265 encoder (NVIDIA’s encoder). Refer to the GPU manufacturer’s list to know if your GPU integrates this H.265 encoding technology. For those who don’t, there are boxes on the market that encode a video input to an Ethernet network “output”.
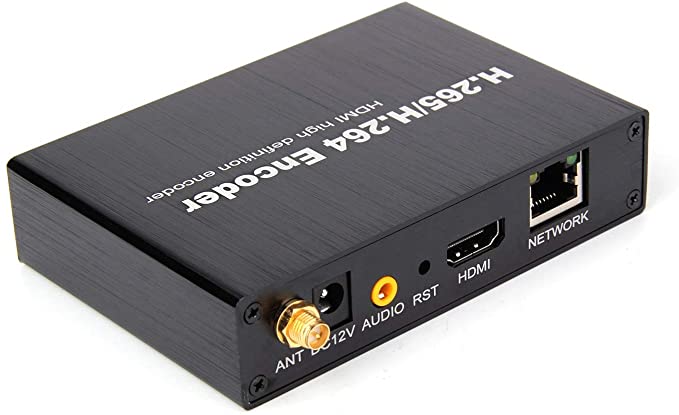
There are several models on the market. We will focus on a model that is widely available and whose price remains correct: ON-DMI-16D (1080P@50fps) or ON-DM1-16A (1080p@60fps). Here are the manufacturer’s specifications.
H.265/H.264 HDMI Video Encoder |
||
| Basic | Information | Username:admin; Password:12345; IP:192.168.1.120 |
| Model | ON-DMI-16D or ON-DMI-16A | |
| Chipset | Hi3516D (1080p@50fps) or Hi3516A (1080p@60fps) | |
| Video/Audio Compression |
Video Encoding | H.265/H.264 Encoding |
| Audio | AAC, G.711U, G.711A; Sample: 48000kHz;G.711U/A for NVR | |
| Audio sampling | 32K, 48K, 64K, 128K or 8000HZ(for NVR) | |
| Bitrate | CBR/VBR; 64kbps-12Mbps(adjustable) | |
| Frame rate | 1-30fps (adjustable) | |
| Bitrate | Main Stream:1920*1080, 1600*900, 1440*1050, 1280*1024, 1280*800, 1280*720; Sub Stream:1280*720;800*600, 720*576, 640*480, 640*352, 352*288, 320*240 |
|
| Video Stream | UDP | udp://@224.1.2.3:10000 |
| TS stream | http://192.168.1.120:80/ts/0(main stream) http://192.168.1.120:80/ts/1(sub stream) |
|
| RTSP | rtsp://192.168.1.120:554/live/0(main stream) rtsp://192.168.1.120:554/live/1(sub stream) |
|
| Network Protocols |
Protocols | TCP/IP, UDP, RTSP, ONVIF, HTTP, DNS, RTMP, TS stream, DHCP |
| WI-FI Protocols | Support 802.11b/g/n, WEP, WPA, WPA2 Encrypted Protocol | |
| Private Protocols | Hikvision and DaHua Private Protocols | |
| Interfaces | Network Port | RJ45 10M / 100M Adaptive Ethernet Interface |
| HDMI | 1CH HDMI Input | |
| Reset | Support | |
| Others | Operating Environment | Temperature: -10℃~+55℃; Humidity: <95% |
| Server | Support Baidu Cloud, Youtube, Wowza and other streaming media servers | |
| NVR Compatibility | Support H.265 NVR from Hikvision and DaHua【Audio:G.711U】 | |
| CMS Client | Support Hikvision (iVMS-4200/8700) and DaHua (SmartPSS) | |
| Power Supply | DC 12V/1A | |
| Consumption | ≤3W | |
| Dimension | 115(L) * 70(W) * 33(H)mm | |
Here is the encoder manual to download: H.265 HDMI Video Encoder Quick Start Guide_ERV1.2.pdf

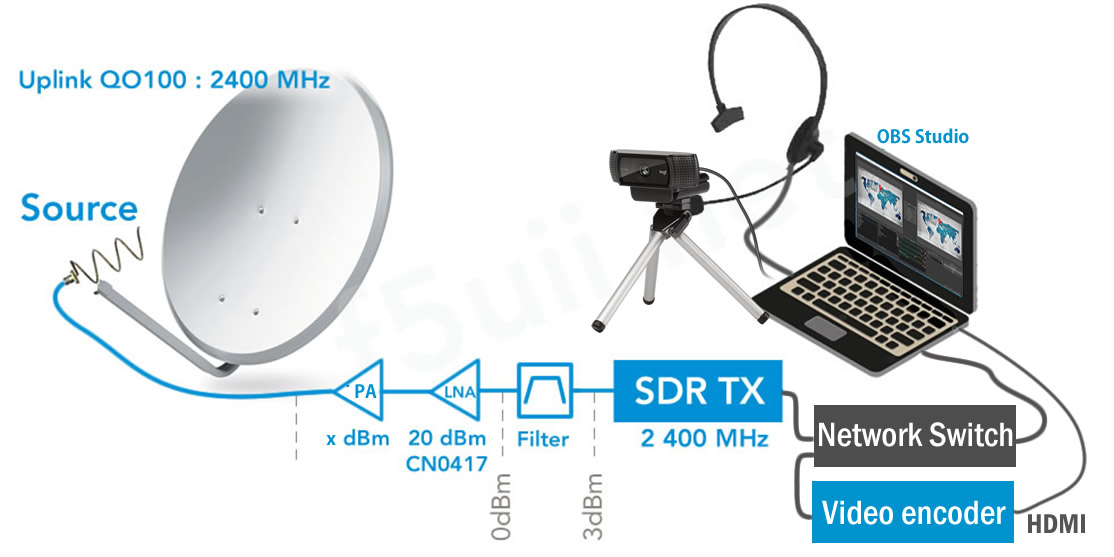
The case is to be considered as a screen or a video projector that would be connected to your computer. Except that in our case, the encoder does not display an image but encodes the video and audio to send it via a network to a receiver/diffuser, a receiver which in our case is the Adalm Pluto with the firmware PlutoDVB. The H.264/H.265 encoder has an HDMI connector through which we will send the video and audio. It is advisable to use the RJ45 cable to connect the box to the network rather to the wifi network, which is more prone to disturbance.
It is therefore also assumed that you have also connected your Adalm Pluto on an Ethernet network (see my previous article to perform this operation).
Where to buy this H.265 encoder ?
You can find this encoder at various retailers, usually shipped from China.
Check the plug type of the power supply unit, use a US adapter if necessary.
Let’s plug in the encoder
We need to connect the video input of the encoder which is in HDMI to your computer. Personally I use a laptop PC that has an HDMI port and also a VGA video output. For more comfort, I connect a second monitor to my computer to the VGA port of the computer.
Then, connect by an RJ45 patch cord your encoder on your network, to your switch or router, on which is also connected your Adalm Pluto (the implementation of the PlutoSDR on network is detailed here). Power your encoder using the 12V/2A power supply provided.
After a few moments, the operating system detects on the one hand a new screen/monitor, and on the other hand a new audio channel.
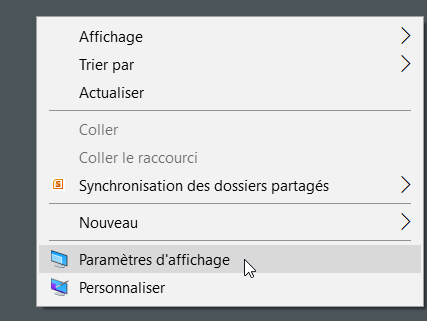
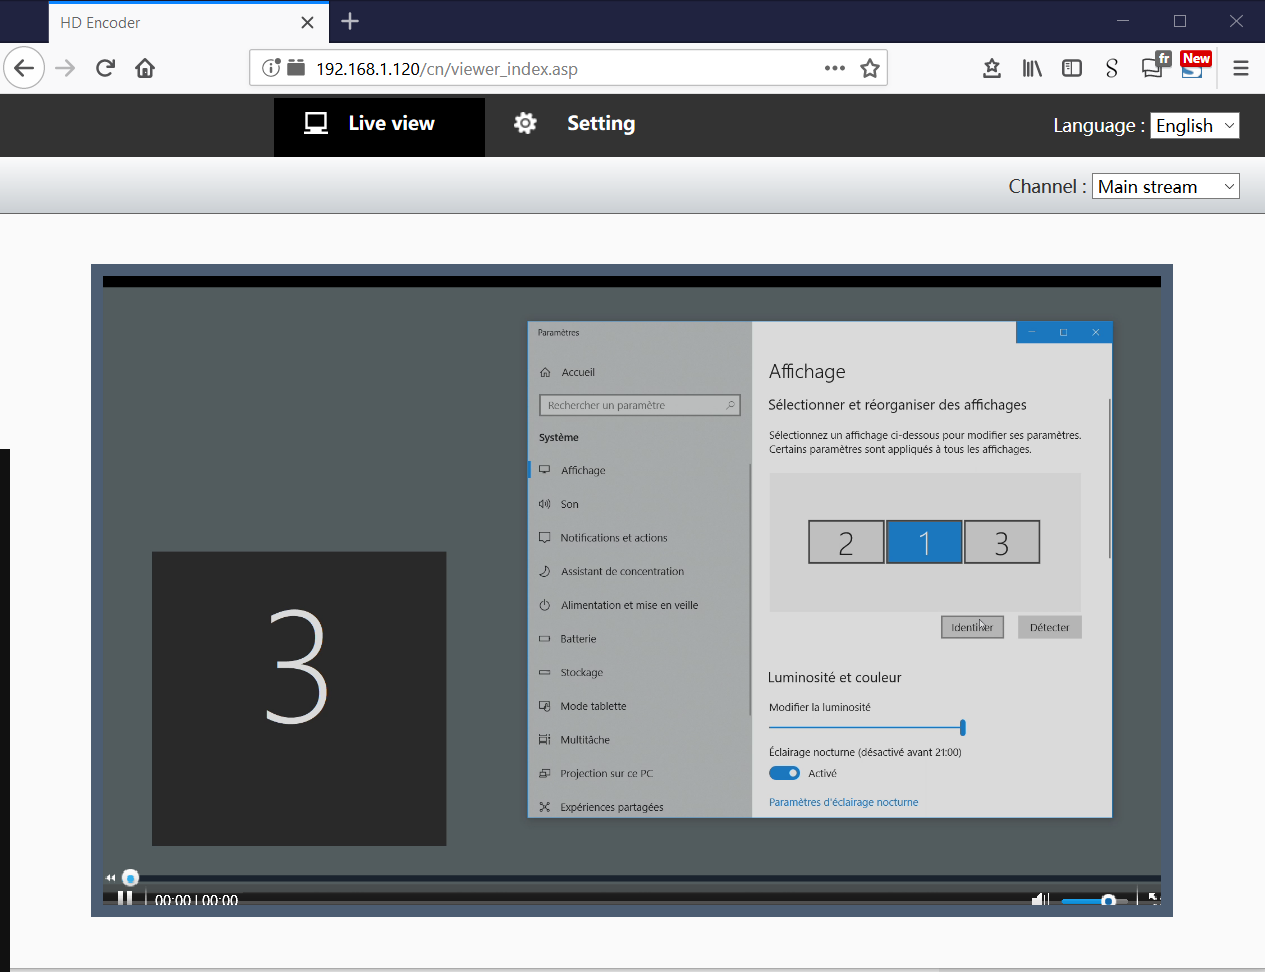
- If, like me, you have two screens, first of all, let’s organize the available screens to match their physical positions. Right click on the desktop and choose Display Settings.
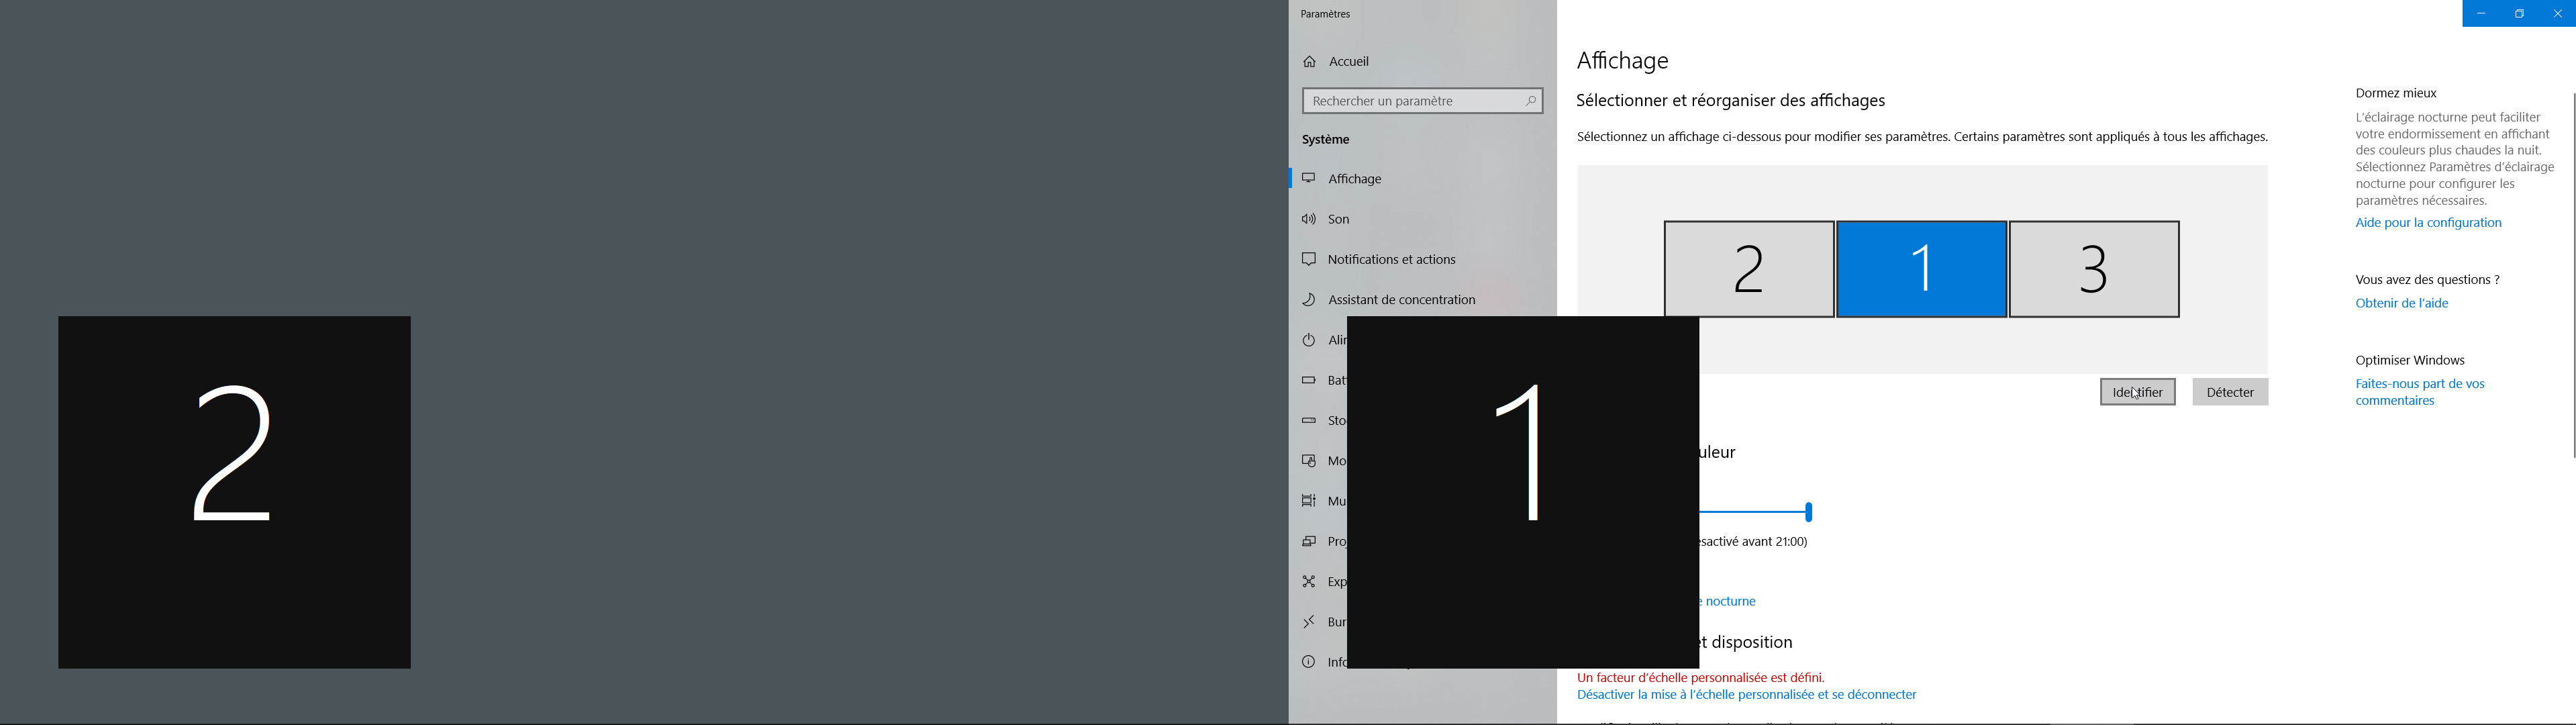
- Click on Identify to see that your screens are well positioned. If necessary, drag and drop one or the other of the screens. In my case, screen 2 is the VGA screen, screen 1 is the main laptop screen, and screen 3 is the H265 encoder.
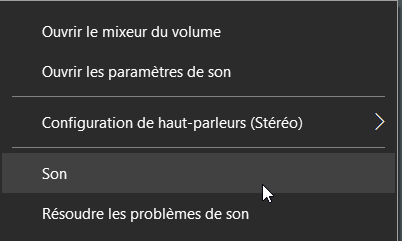
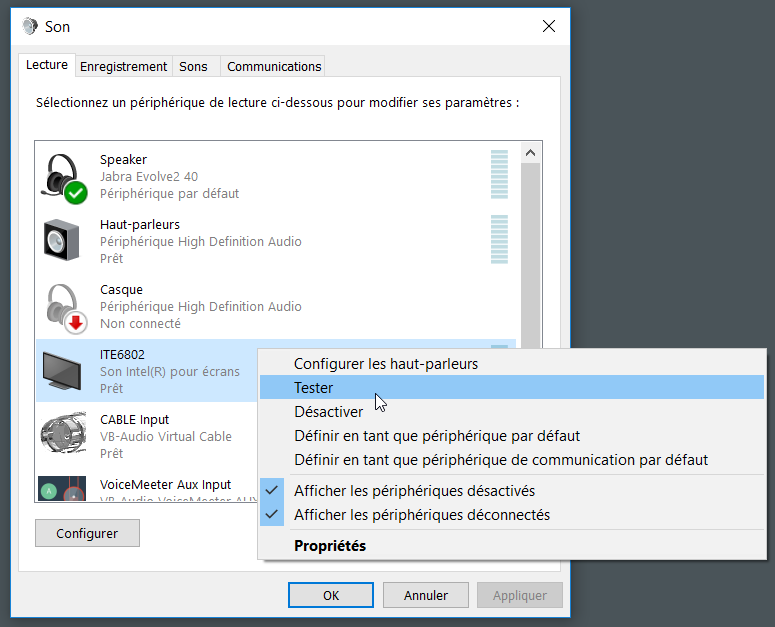
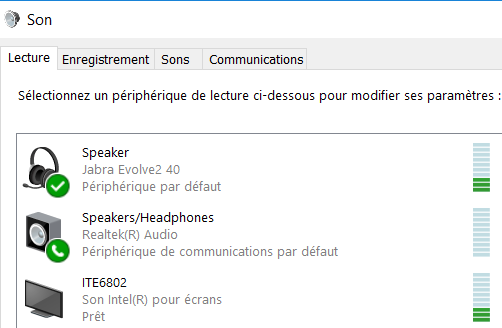
- Let’s now check the presence of the new audio broadcast channel corresponding to the encoder box. Right-click on the speaker in the taskbar (bottom right) and then click on Sound (or type Sound in your windows main start menu).
- On the play tab of the window that opened, an audio channel called ITE6802 should appear in the list. A right click, followed by a click on Test should show you an animation of the green bar graph. Everything is now functional.


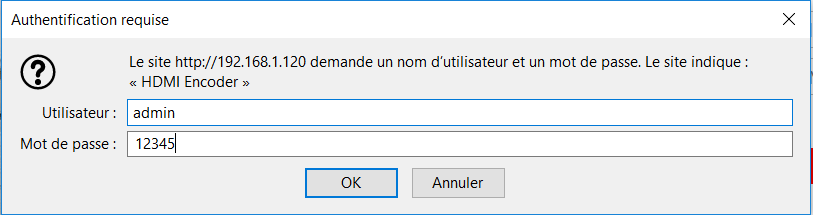
- Connect to the encoder from a web browser by typing its IP address which is 192.168.1.120. The login to enter is admin and the password is 12345.
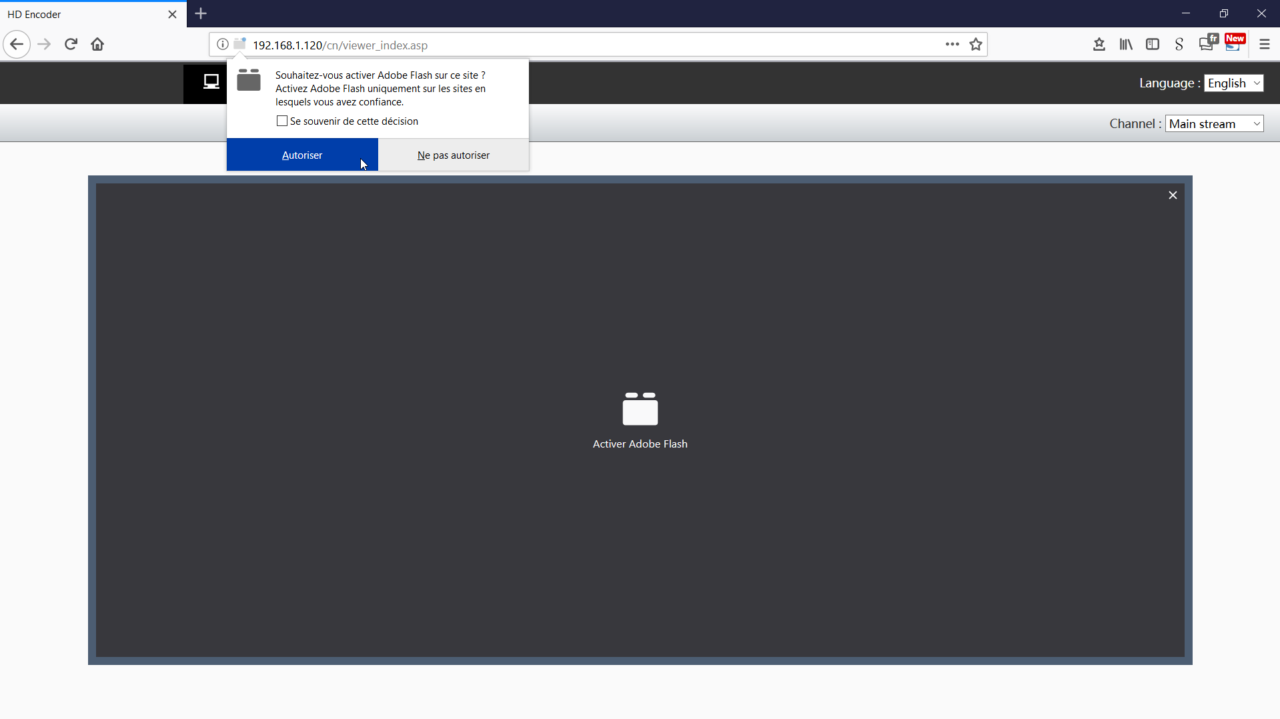
- After logging in, on the Live view page, and validating the browser warning to authorize Flash player
- In the integrated window on this page, you can view the video stream captured by the encoder. In my case, this is screen number 3.


Controlling the video encoder
There are two ways to use the PlutoDVB and External Encoder couple :
- The PlutoDVB directly controls the bitrate (CBR) and image definition values that the encoder should encode and send to it. It is the PlutoDVB that determines these parameters according to the expected transmission characteristics. We will call this method: Automatic method, and we will deal with it in a second step.
- Another option is to set the definition and the audio/video bitrates that you send to the plutoSDR yourself. Let’s call this the manual method.
We will study both methods. Let’s look at the manual method first.
Bad news for audio encoding ?
Some of you have of course already tested the box and have probably noticed some issues. Indeed the injected audio channel does not reach the PlutoDVB. Rejoice, solutions exist for both methods (manual and automatic). It makes the use a bit more complex but as usual, by following the steps below, you will get the expected result: H265 images with audio.
Let’s clarify the technical issue of the audio: By default, the encoder does not transmit audio on the streaming channel. To unblock this situation, we need to set it to “audioen” for “audio enable”. But this parameter is curiously not available on the encoder web interface. We will be able to send it through its “computer” interface, its API server (this is the channel used by PlutoDVB in automatic method).
First of all the selection of the method is made by the way of the input or not of the IP address of your encoder in the Controller page of PlutoDVB. For our manual method, you must have the IP field empty (or with the value undefined). Don’t forget to click on the Apply Settings button.


Prior to using it in manual mode, we will install a computer tool that will allow us to communicate in the right language with the encoder’s API server and pass our audioen missing parameter to it. Moreover, this will allow us to adjust all the parameters of the video encoder directly. Don’t worry, everything is explained step by step.
Encoder control by REST client software
- Download and install the software Advanced client REST
- Click on SKIP in the welcome window.
- Download the configuration file prepared for you : arc-data-export-H265.txt
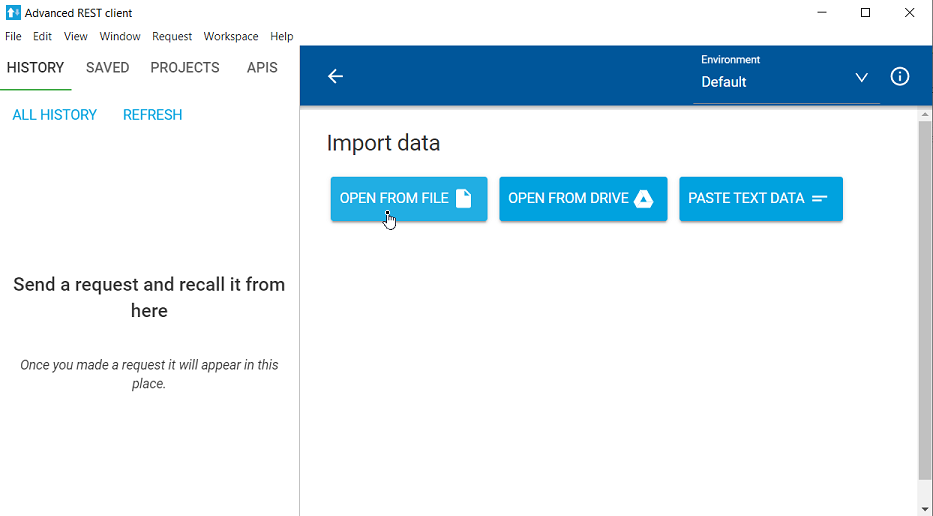
- Choose Import Data from the File menu
- Clic on OPEN FROM FILE
- Select the downloaded “txt” file. To confirm the import of the “H265-Encoder” project of the 3 requests (audio, video and multicast), click the IMPORT DATA button.
- You will find the 3 requests in the PROJECTS tab under H265-Encoder by F5UII. By clicking on each line of the left column, a tab is displayed on the right with the names of the 3 AUDIO VIDEO MULTICAST queries. We are going to use the BODY tab which contains all the parameters that we are going to send to the encoder.
Below (identical to the capture), here is the content of the query that allows us to send directly. You will find the audioen parameter that we were missing (<audioen>1</audioen>)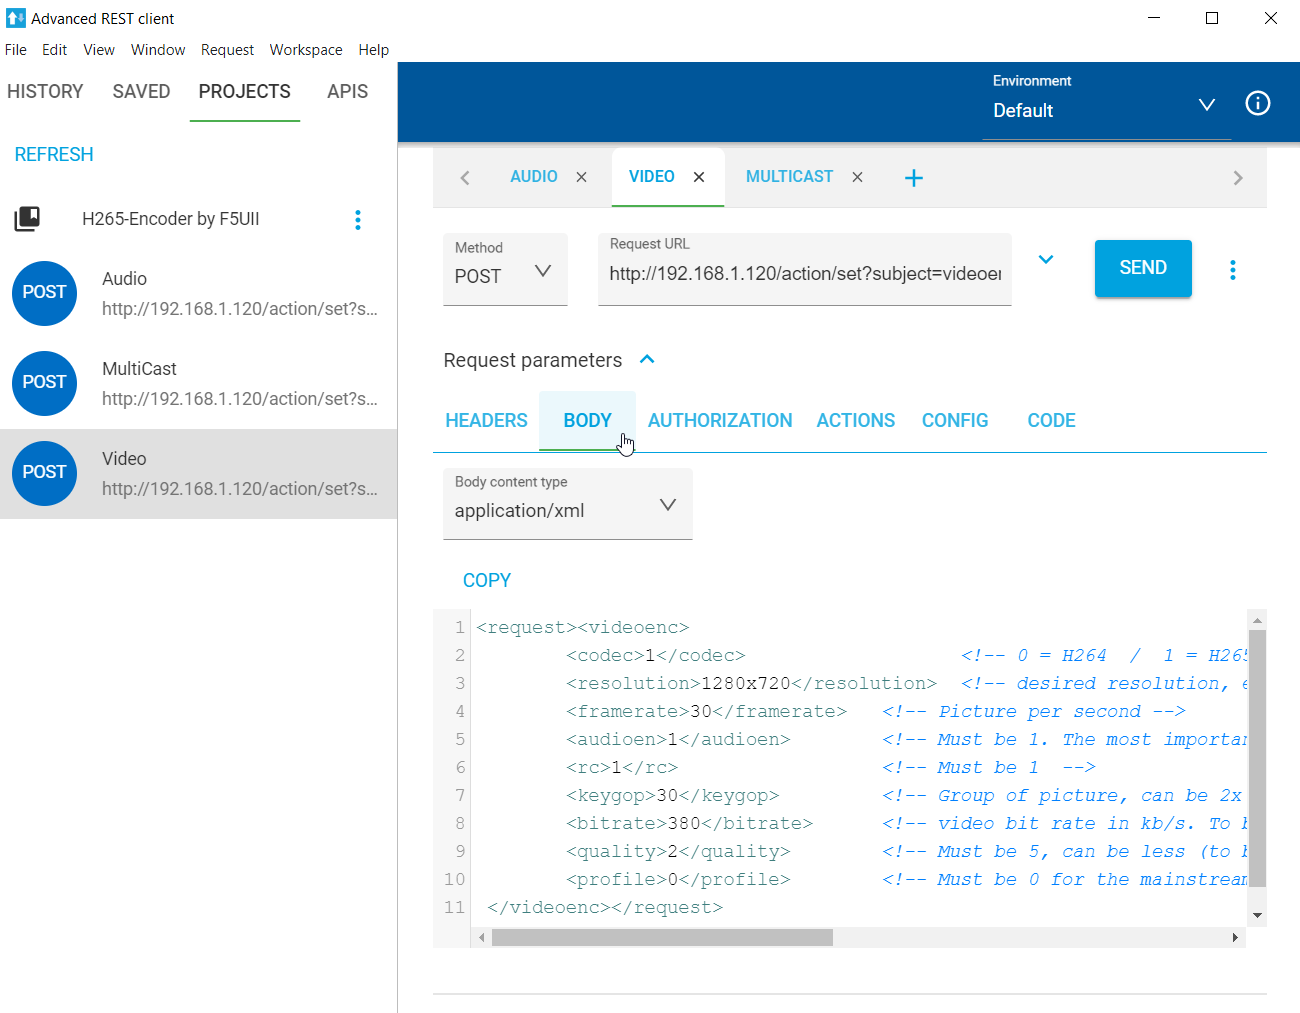
You can modify the values of the different parameters positioned between the keywords <keyword>, and without ever changing the content of the keywords.
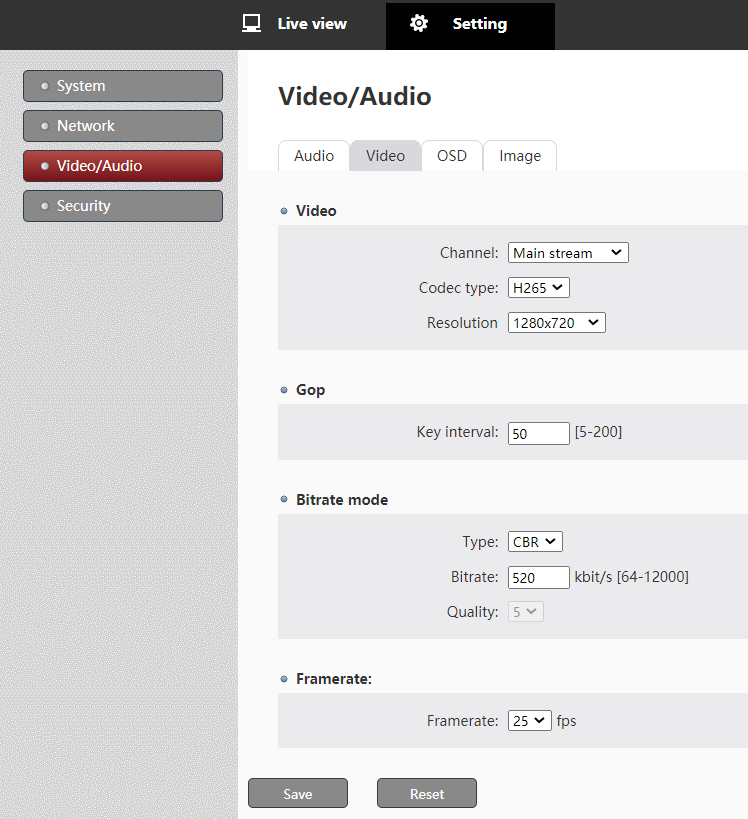
Here are the settings that correspond to those on your encoder’s configuration page found on its Settings / VideoAudio page and on the Video tab.
<request><videoenc> <codec>1</codec> <!-- 0 = H264 / 1 = H265 --> <resolution>1280x720</resolution> <!-- desired resolution, even if not in the list of standard resolutions proposed by the encoder. --> <framerate>25</framerate> <!-- Picture per second --> <audioen>1</audioen> <!-- Muste be 1. The most important for have sound streaming --> <rc>1</rc> <!-- Must be 1 --> <keygop>50</keygop> <!-- Group of picture, can be 2x framerate--> <bitrate>380</bitrate> <!-- video bit rate in kb/s. To be adjusted according to the capacity of your DATV broadcast --> <quality>5</quality> <!-- Must be 5, can be less (to be tested...) --> <profile>0</profile> <!-- Must be 0 for the mainstream --> </videoenc></request> - Verify that the IP address of the encoder that starts the command line (Request URL) is that of the encoder box. The address of our configuration is the default encoder address of the encoder box which is 192.168.1.120. Click on SEND. The request is sent to the box. If the box has received your parameters, a green “200 OK” is displayed at the bottom of the Advanced REST client. It is thanks to this little line <audio>1</audio> that the audio will be available in your stream and then broadcast by PlutoDVB.
Please note that your encoder keeps this setting in memory, even after powering up again. You will then be able to use the automatic method directly (see below). Of course, and on the contrary, if you use the encoder reset function (accessible through the Setting / System menu, Maintain tab – factory reset button), this is no longer the case.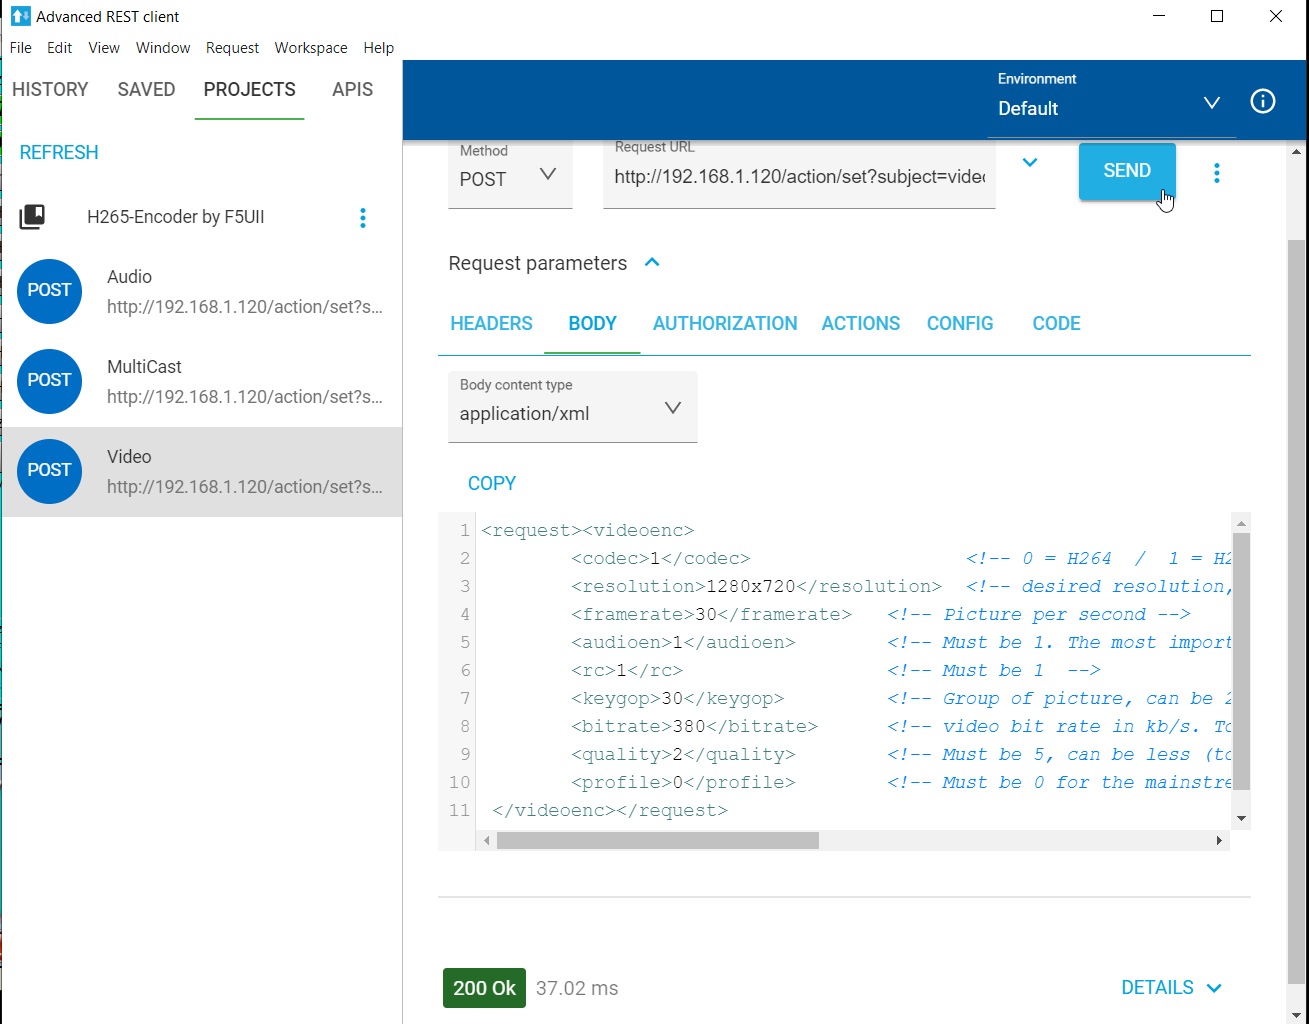
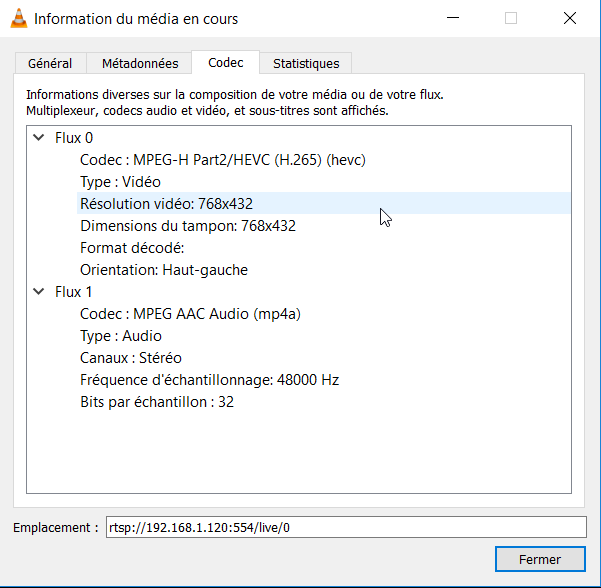
- You can check directly on the encoder page that your settings are the ones you just passed. Don’t worry if the definition area shows an empty field. This is normal if you ask for a definition that is not in the list of definitions offered by the interactive decoder page. The resolution is still taken into consideration. You can easily check this by connecting VLC to the RTSP stream. To do so, launch VLC (VideoLan). Open the network stream (Media Menu Open network stream or CTRL-N) of what the box is able to encode. The channel to connect is the Main stream which is numbered zero, by typing rtsp://192.168.1.120:554/live/0 in VLC. To display the definition, and check the codec used, do CTRL-J
- The audio request also allows you to configure the characteristics of your audio track. Again, after clicking SEND, you can see on the Settings / VideoAudio page, Audio tab of the encoder that your settings have been taken into account.
<request><audioenc> <channel>1</channel> <!-- 0 for mono 1 for stereo --> <bitrate>32000</bitrate> <!-- audio bitrate : 32000 48000 64000 128000 --> <codec>2</codec> <!-- Codec 0=G711U, 1=G711A, 2=AAC (good choice) --> <samples>48000</samples> <!-- Bitrate 32000 44100 48000 (good choice) --> <input>0</input> <!-- 0 for HDMI input 1 for Line in --> </audioenc></request> - The multicast request simply opens the mainstream streaming channel to the IP address of your Pluto. Customize your request by placing between the addr tags the IP address of your Pluto.
<request><multicast>

<mcast>
   <active>1</active>        <!-- 1 for enabled the stream -->
   <port>8282</port>         <!-- PlutoDVB request here 8282 -->
   <addr>192.168.1.8</addr>  <!-- PlutoSDR ip address here -->
</mcast>

<mcast>
   <active>0</active>    <!-- 0 for disabled this default stream -->
   <port>10001</port>
   <addr>224.1.2.3</addr>
</mcast>

<mcast>
   <active>0</active>	 <!-- 0 for disabled this default stream -->
   <port>10002</port>
   <addr>224.1.2.3</addr>
</mcast>
</multicast></request>
- We are ready to launch OBS Studio, the software you took in hand with the previous article ( Transmit digital television signals over Qatar Oscar 100 satellite )
Transmit your images with OBS Studio and the PlutoDVB Controller
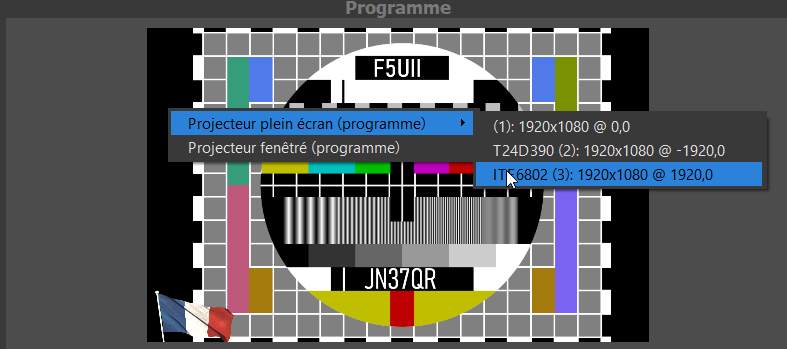
- When OBS Studio is started, the encoder being of course connected in HDMI on the same computer, right click on the Program screen, and choose the ITE6802 screen that corresponds to the encoder. This way your OBS Studio image is displayed at the HDMI input of your encoder. In VLC which is connected as an RTSP stream to the encoder, you should actually see the program image displayed there.
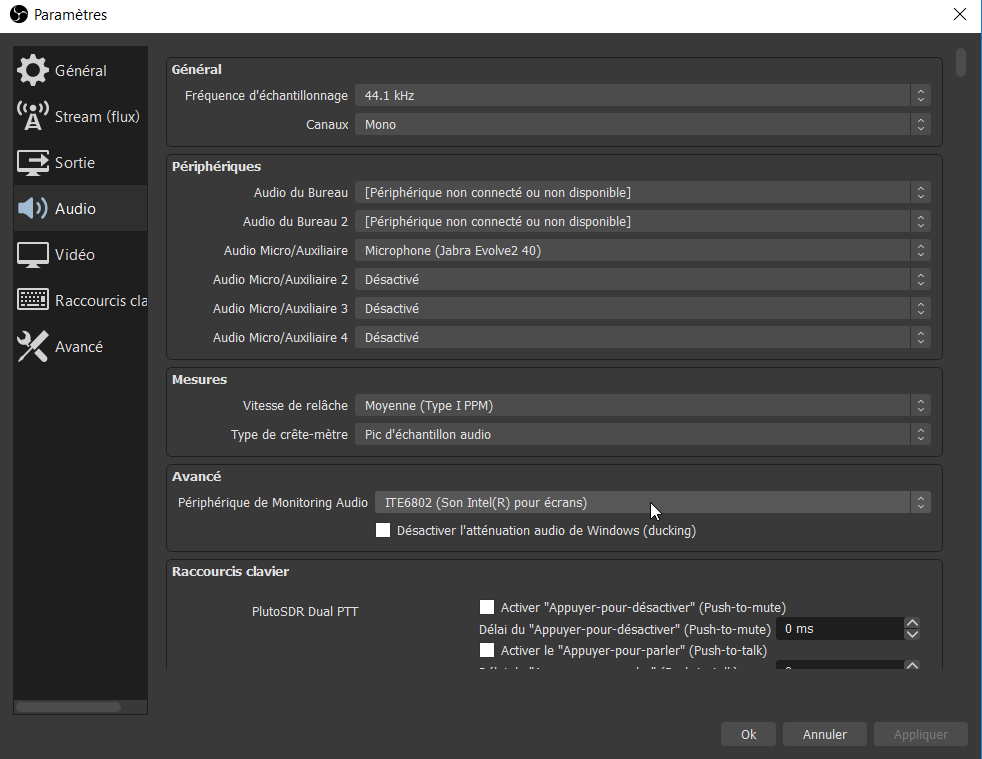
- Now for the sound, to make sure that the output sound arrives to the HDMI sound input, open the OBS Studio Settings panel, select the Audio tab. In the Audio Monitoring device (Advanced), select the ITE6802 output corresponding to the encoder. Validate the modification with OK.
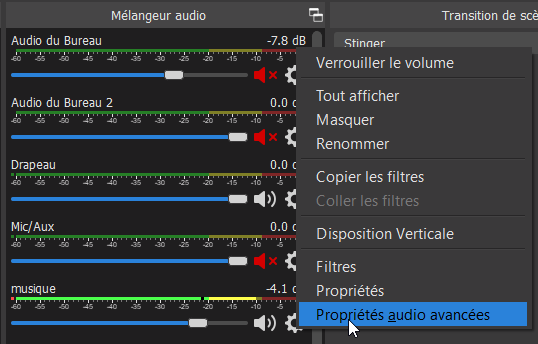
- On the audio channels of your different scenes, you need to activate the Monitoring output: Click on the audio channel setting wheel in the mixer, and choose Advanced Audio Properties.
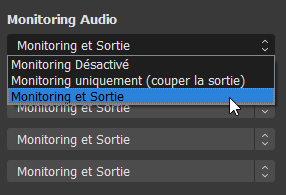
- Validate Monitoring and Output on audio channels.
- To check that the sound is sent to the input of your encoder, open the Windows Sound panel to check the dynamic bar graph. (To launch this Sound panel, type Sound in the Windows search bar, or right-click on the taskbar speaker)

- The image and the sound are thus diffused, we can carry out the settings of the PlutoDVB Controller.
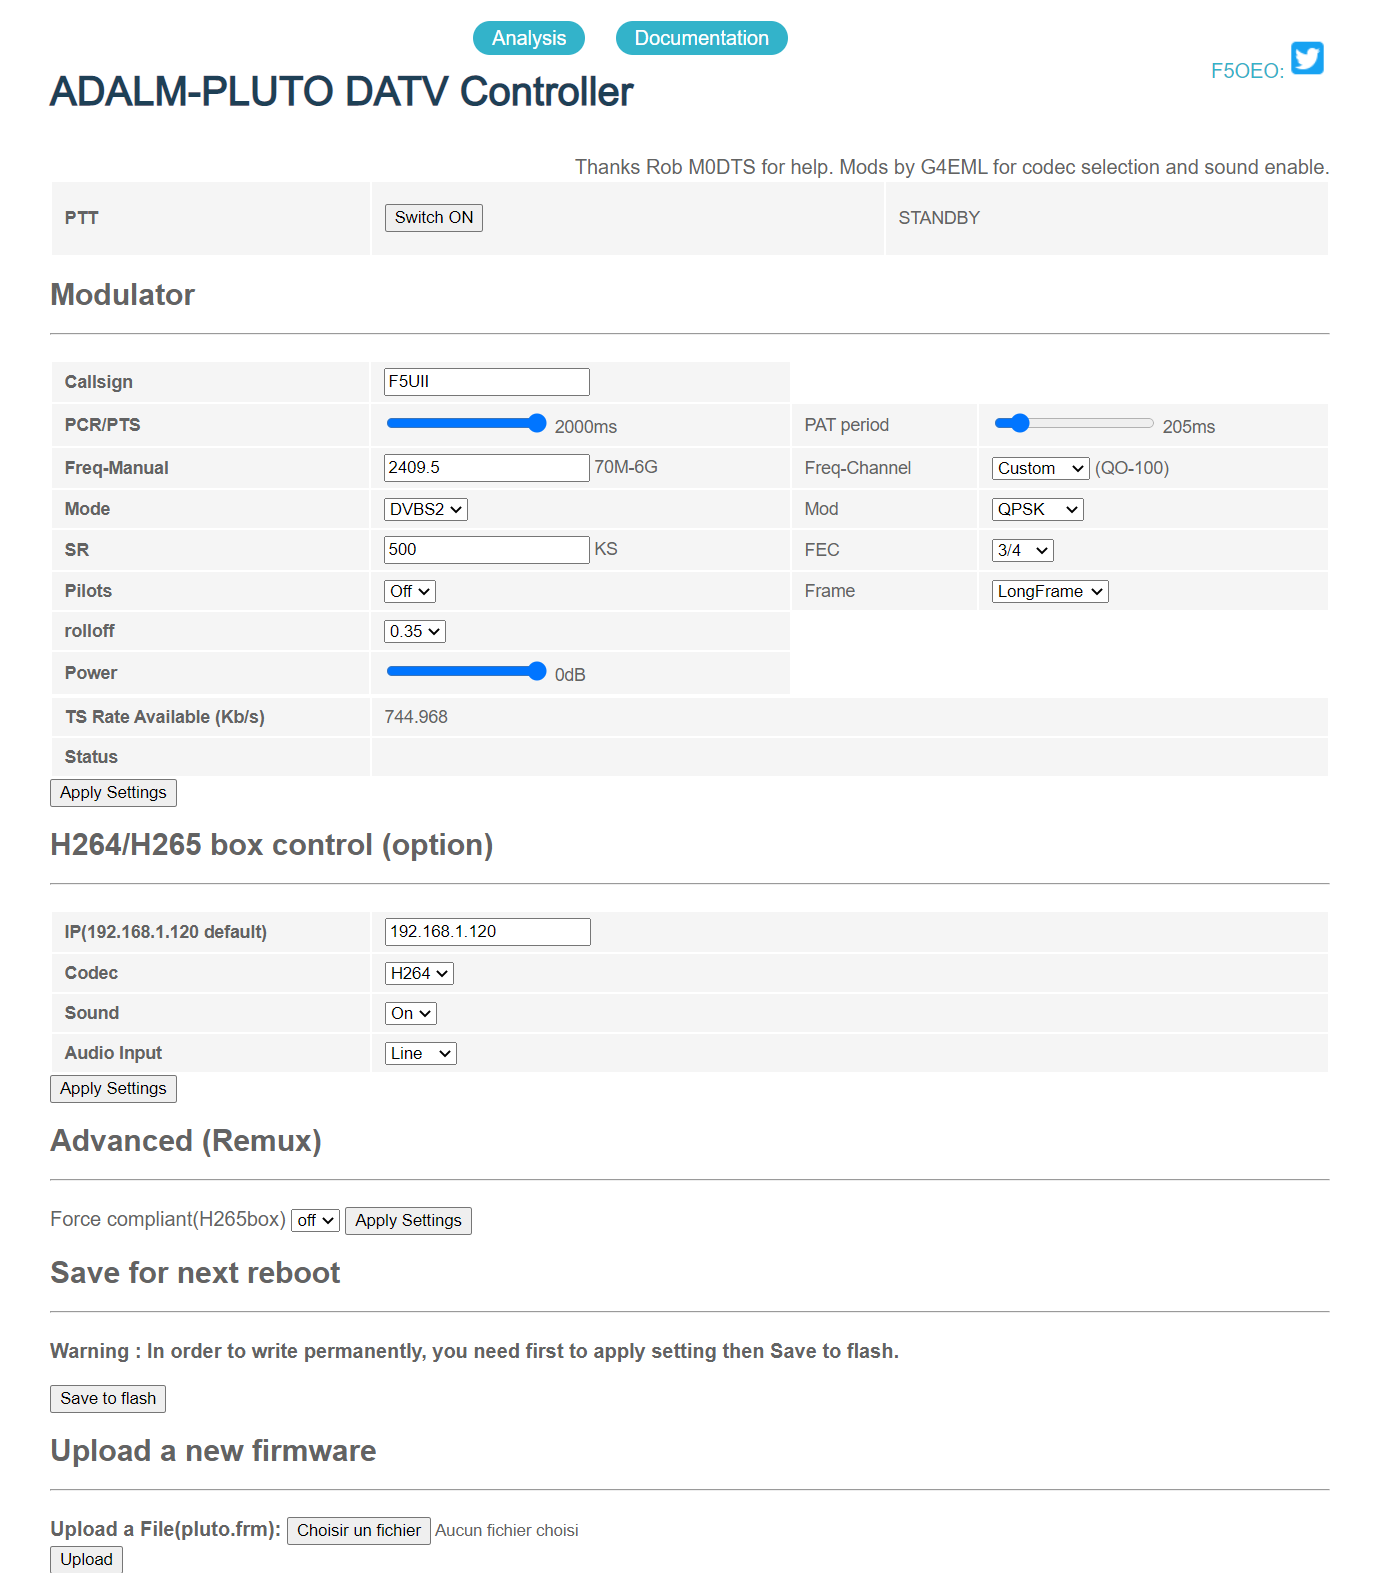
- Open the configuration page of your PlutoDVB, with your browser in which you will have entered its IP address. Open the Controller page.

-
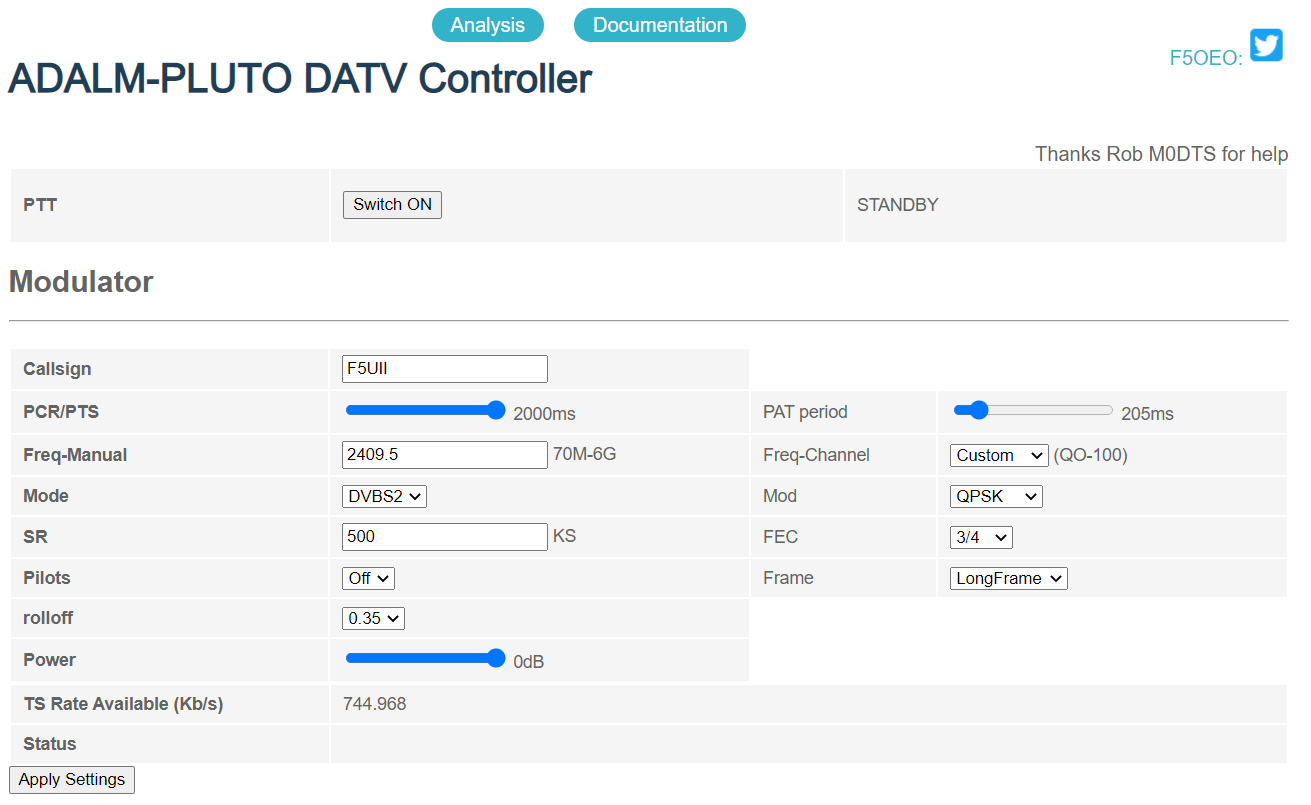
In the Modulator section, enter your callsign and the usual characteristics of your DATV transmission: Frequency, Mode, Symbal Rate, FEC.
- On the encoder setting panel (Setting, Audio/Video, Video tab) determine the CBR rate that will suit your previously set transmission.
- Go back to PlutoDVB and now apply your settings using the Apply Settings button in the Modulator part.
- Check with the Analysis page that the flow rate is appropriate. If you have any doubts on this point, and it is important for a good transmission, I invite you to reread or review this part of the explanation given on this page. At the bottom of the Controller page, use the Save to flash button, to find all your settings the next time you restart the Adalm Pluto.
- The frequency is still free, so you can switch to transmit by pressing the PTT Switch ON button at the top of the page. The same button will be used to stop the transmission.
- During the broadcast, without interrupting the emission, you can change image settings such as resolution and CBR rate. You can make these changes from the encoder settings page, or with the REST client software. During these operations, watch your bitrate on the PlutoDVB Analysis page.


As a reminder, this method will only work if you have successfully sent the “video” request to the encoder server, asking it to transmit the audio channel (see above).
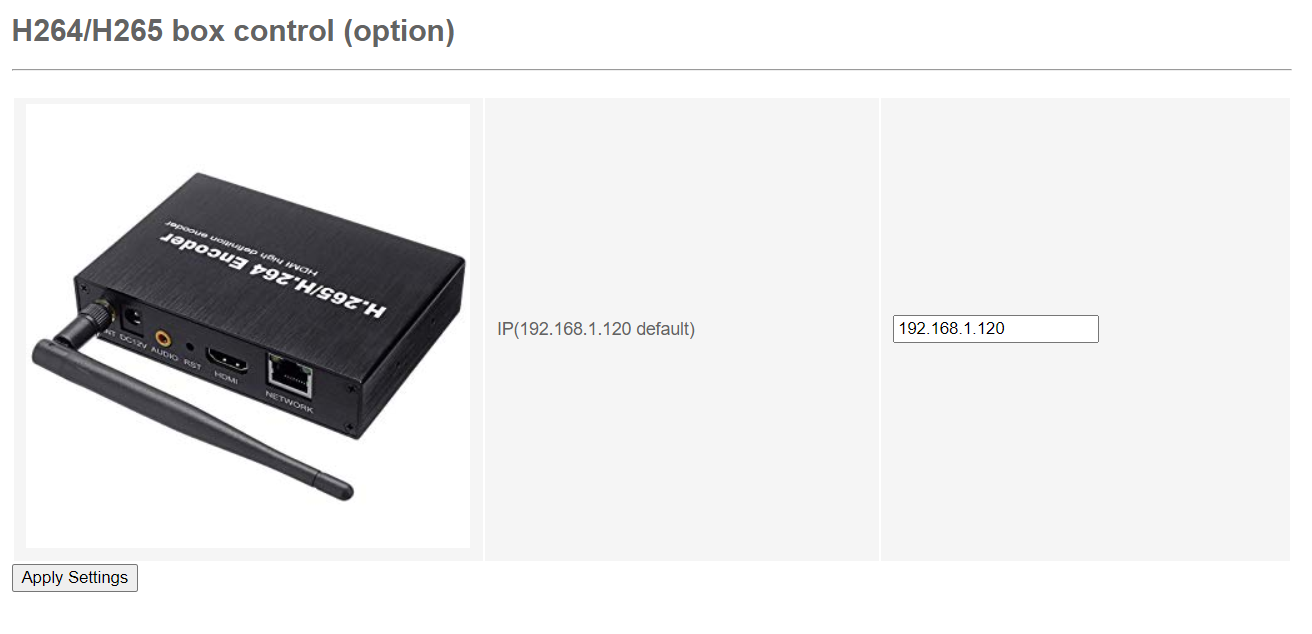
- In the H264/H265 box control section of the PlutoDVB Controller page, enter the IP address of your encoder so that PlutoDVB can send the optimum parameters to the encoding box. Indeed after having entered the parameters of your DATV broadcast, PlutoDVB will determine the characteristics of the stream that the encoder will have to send. These parameters are in particular the definition (size) of the image, the frame rate automatically calculated from your configuration indicated in the Modulator part.

- In the Modulator section, enter your callsign and the usual characteristics of your DATV transmission: Frequency, Mode, Symbal Rate, FEC. Apply your settings by clicking on the Apply Settings button.
- Launch VLC (VideoLan). Open the network stream (Media Menu Open Network Stream or CTRL-N) of what the box is able to encode. The channel to connect is the Main stream which is numbered zero, by typing rtsp://192.168.1.120:554/live/0 in VLC
The resolution of the displayed image corresponds to the one that will be sent by the encoder to the PlutoSDR. It is determined by a PlutoDVB script (strategy.sh), depending on the bitrate of the encoded stream (and thus directly from your SR and FEC).
The resolution of the image corresponds to this table.Video Rate Resolution W (px) Resolution H (px) Audio Video Rate (fps) 384 216 32 k x1 10 384 216 32 k x1 15 576 324 32 k x1 15 768 432 32 k x2 25 1280 720 64 k x 2 25 >= 1200 k 1920 1080 64 k x 2 25

To display the definition, and check the codec used, do CTRL-J
The Evariste F5OEO PlutoDVB firmware (version for Brave) does not send, unfortunately, the audio validation parameter to the encoder box. An elegant solution was found by G4EML with the help of M1SJE.
Colin G4EML suggests 5 modified files to be updated on the PlutoDVB
- /www/encoder_control.php
- /www/pluto.php
- /www/save.php
- /root/udpts.sh
- /root/strategy.sh
This will allow to have on the controller panel the possibility to choose the H264 or H265 codec of the encoder, to choose the HDMI or Line In audio source, and of course to correct the audio issue. Also on this page, the list of QO100 channels and their frequencies have been updated, and are in accordance with the current band plan of the satellite transponder.
Unfortunately, due to the way the Pluto file system works, it is not possible to modify the files permanently. However, there is a way to update the files on each reboot.
- Copy the files from the repository onto a USB memory stick.
- Connect a USB Hub to the Pluto OTG port and plug the USB stick into the hub.
- Apply power to the Pluto power port.
- On detecting the USB drive the Pluto will auto run the file called ‘runme0.sh’. This shell script will copy the modified files into the Pluto. This is only temporary and does not modify your Pluto at all. Powering up the Pluto without the USB stick will revert back to the original versions.
The files are available on Colin’s GitHub.: https://github.com/g4eml/Pluto_mods
Not having personally succeeded in implementing this technique of automated copying by USB key, I undertook to forward the files from a raspberry pi which is connected to the local network, and on which I downloaded the zip file made available on Github by Colin.
- On the raspberry (whose address is 192.168.1.10), connected with the usual pi account :
-
sudo wget https://github.com/g4eml/Pluto_mods/archive/master.zip
-
unzip master.zip
- A Pluto_mods-master directory containing the files is available.
ls Pluto_mods-master
-
- On an SSH session on the pluto :
-
 mkdir /media/sda
 cd /media/sda
- To copy via the network
scp pi@192.168.1.10:/home/pi/Pluto_mods-master/* /media/sda/
- Run the script runme0.sh
sh runme0.sh
- I completed the installation by executing this line contained in runme0.sh, without the parameters excluding the display of the execution traces. It’s good for curious people like me…
sh /root/udpts.sh
-
Conclusion
Here is this new article about the H265/H264 external video encoder finished. For those of you who remember the conclusion of my last article, this is not quite the topic that was planned for the next article. I finally decided to respond to the many requests from DATVers who let their encoder box sleep on a shelf.
I hope that Evariste F5OEO will go through this, and will be able to find a moment between his many projects to add at least this line of code in encoder_control.php and redistribute a new firmware to install on our dear PlutoSDR. 

In the meantime, to all of you, good transmissions in DATV and to the pleasure of (re)-crossing you on the satellite #QO100. You can follow my news on twitter.
Feel free to leave your comments, or questions directly in commentary of the article. I will be happy to answer them. Conversely, questions of general interest arriving by email or private contact will not be answered.